
From Mould to Gold: the Conservation of a Mid-19th Century Gilded Frame
by Grace Barrand
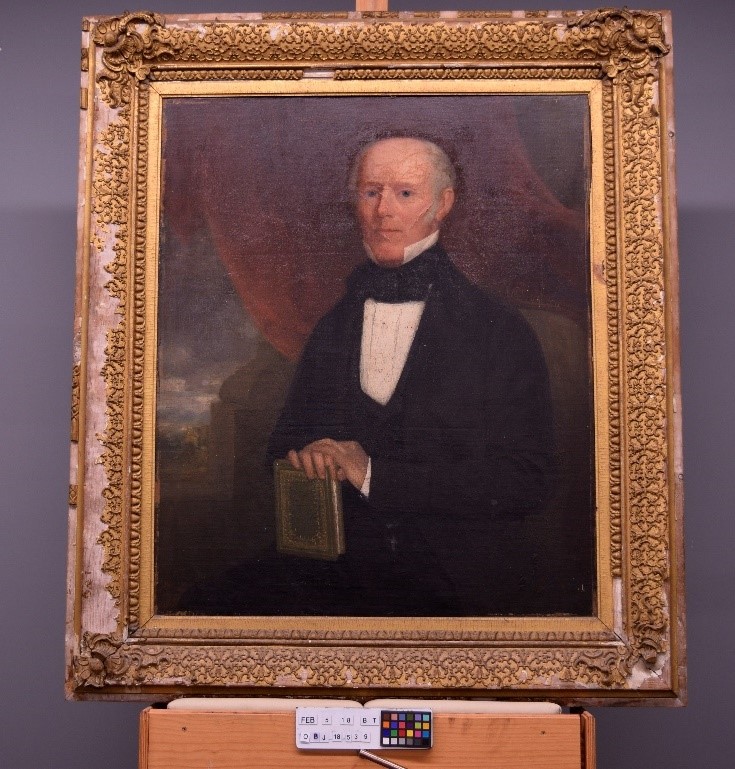
Grace Barrand, frames conservation student at the University of Melbourne, explains the process of partially conserving a mid-19th century composition frame from the Bathurst District Historical Society. The project was undertaken during a conservation treatment subject as part of the Masters in Cultural Materials Conservation at the University of Melbourne. It is almost certainly the original frame.
Dating the Frame
Whenever someone asks me what it is I study I always say; “being a conservator is a bit like being a forensic detective on a crime show – you start at the end and use the evidence to find out what happened at the beginning”. I could also say that we restore as many Pablo Picassos in our everyday job as there are real life Horatio Caine’s in the actual police force, because things just really aren’t usually as glamorous as they may seem. That is, unless you’re a frames conservator.
Frames conservation is all about glamour; the sheen of the gold, the complexity of the design, the height of the ornament, and this project was no different. The frame is a highly finished object laced with scrolling decoration and covered in gold, designed to both protect and enhance the appearance of the portrait through periphery aesthetic opulence (Payne 2007, p. 6). The stylistic design and material of the ornament itself tells the story of the frame’s history, and while much of the ornament has been lost over time, what survived provided me with a launching point from which to date the frame. The first clue was in the material used – compo, or composition, is a casting material made of animal glue, rosin, linseed oil and whiting, and was first introduced to frame making in the late 18th to early 19th century (Newberry 2002, p. 6). Like all good detectives, I confirmed this through the use of ultraviolet irradiation which caused the animal glue in the materials to fluoresce bright white (figure 3) (Rivers and Umney 2003, p. 610).

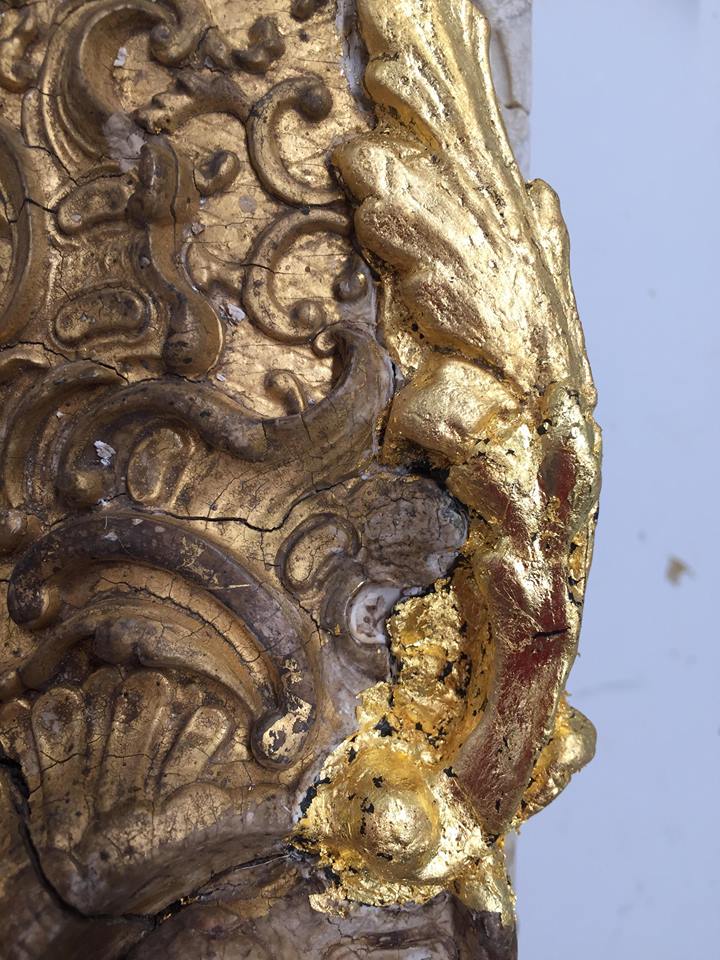
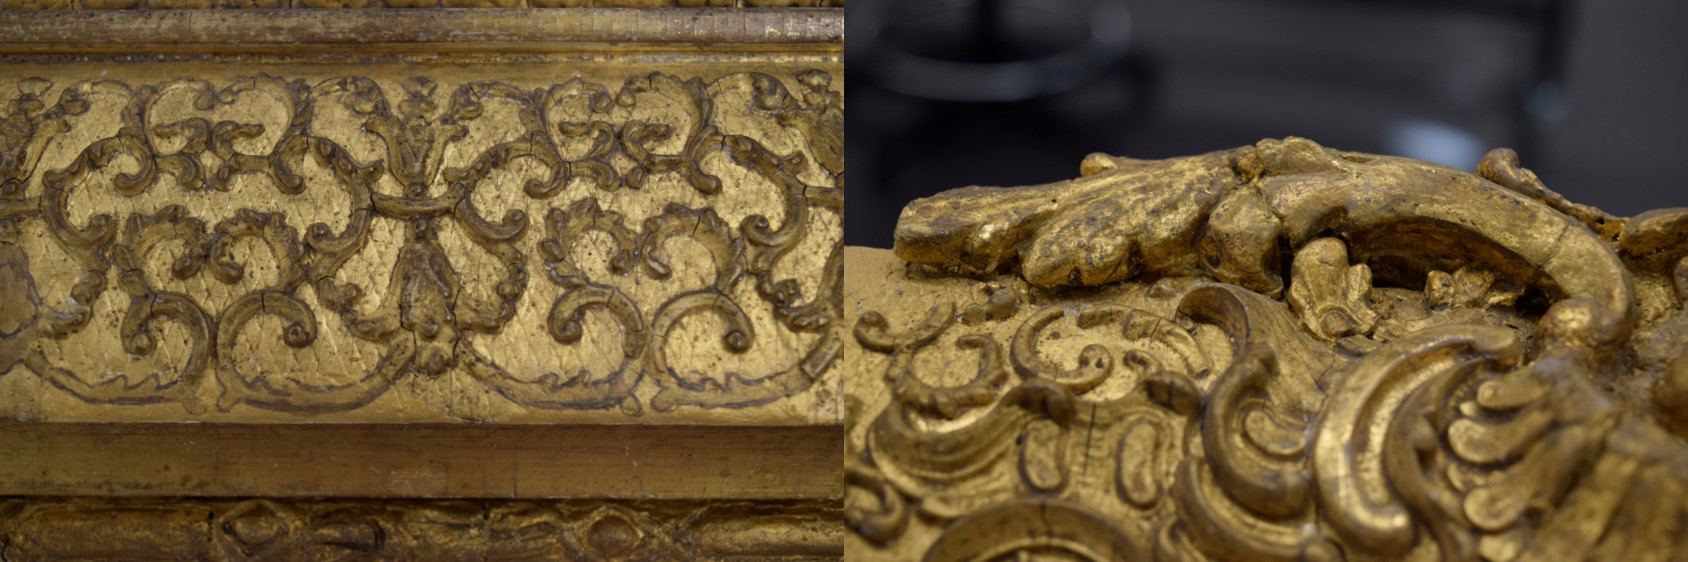
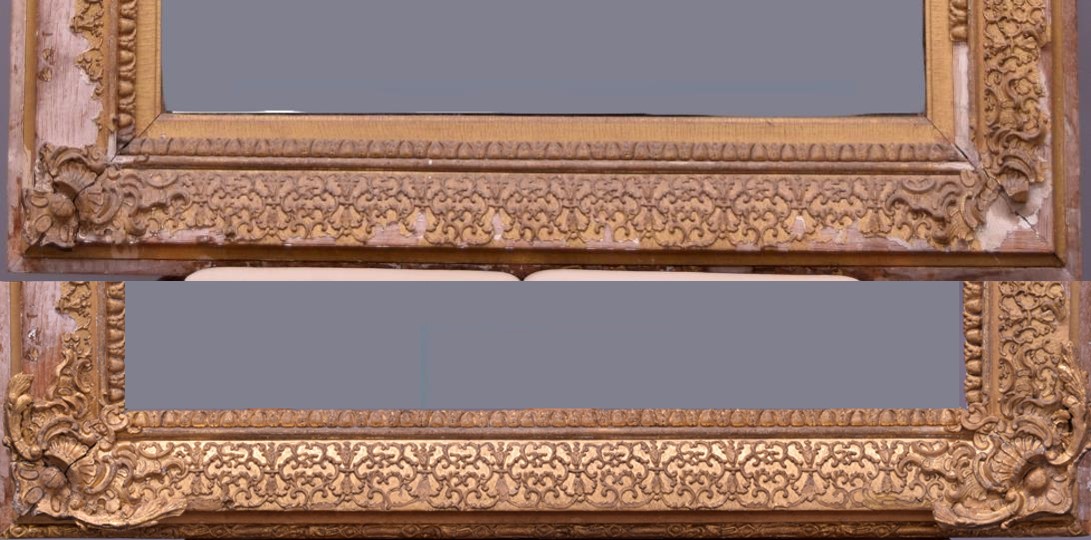
The second clue was found in the style of the ornament, which required a bit more research. Eventually, I found two stylistically similar examples that allowed me to more accurately date the frame to the mid-19th century (figures 4 and 5). The design can be described as Neoclassical European, or Victorian Louis XIV Revival style (Newberry 2002, p. 6), and has been gilded with genuine gold (figure 7). Put simply, the frame is a beautiful object and designed to be so.


However, the frame has been swapped from use to storage and has naturally accumulated some dust and damage along the way. There are overall losses across the surface, particularly concentrated at the bottom corners, on the face left member and along the outer edge design – which is almost completely lost. The wooden structure of the frame, however, remains strong, and so it was possible for me to treat the object without risking further damage. I decided to focus my work on the bottom member and corners, which would allow me to refine a broad range of skills from cleaning to gilding.
The 3 Cs – Cleaning, Consolidation & Casting
The entire surface of the frame, front and back, was brush vacuumed to remove surface dust. More stubborn dirt was dealt with using adjusted water based solutions, applied carefully using a cotton swab. Loose elements were stabilised during cleaning using warm rabbit skin glue (Rivers and Umney 2003, p. 569). This adhesive was applied using a brush for detached pieces or with long plastic spatula for deeper crevices and lifting areas.


In order to recreate areas of loss, impressions of corresponding intact ornaments were taken to create a series of moulds. A fast setting silicon putty known as Pinkysil© (1:1) was chosen for its sufficient flex and workable properties (figure 10) (Koob 2006, p. 81). After dusting lightly with whiting, the mould was ready for casting.
Two batches of compo were made according to different methods. This gave me a deeper appreciation for the different properties of the varied recipes available, allowing me to understand the requirements, strengths and weaknesses of the material. Some important observations included the different working properties when using hide/pearl glue in varying ratios, and the contraction of the material on drying according to the water content (Rivers and Umney 2003, p. 490).
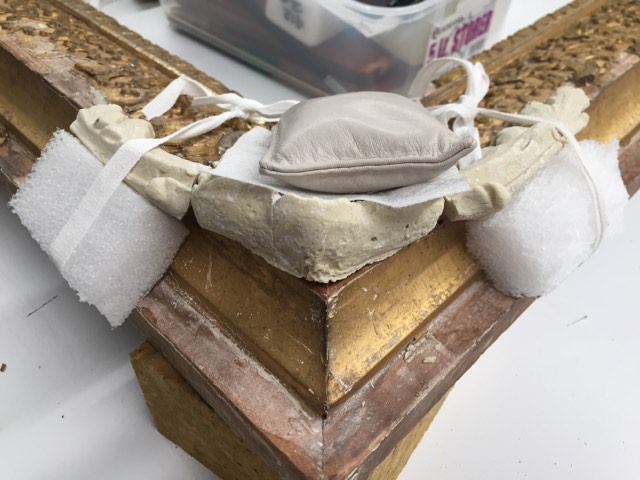
Casting was a lengthy task which required a great deal of patience. Kept warm, the compo was pressed into the mould and, once dry, could be popped out in shape and fitted to the object. This required hours of shaving down using a sharp scalpel and to create the required fit, but once correct, the cast was pinned to dry in place overnight. The following day the pins were removed, the new ornaments were adhered using rabbit skin glue and supported in place to set (figure 14). Areas of exposed wood were sealed using a dilute PVA, infilled using pre-toned Liquitex, sanded back and cross hatched to recreate the netting appearance.

Gilding & Inpainting; Glam it Up then Tone it Back
Gilding, which refers to the application of gold leaf onto an object (see video below), was really satisfying. Casts were first toned back using an acrylic raw umber paint to obtain an accurate aesthetic replica, or applied with black bole (clay) which was then burnished to achieve a smooth surface. It was my first time gilding such complex shapes, and I certainly have a new appreciation for the difficulty of achieving a fully uniform surface! Gaps and holes in the water gild were filled in using gold leaf fragments and, once complete, the gilding was lightly distressed using steel wool to achieve an aged appearance.
Some experimentation was required to accurately tone back the gold without damaging the leaf. Initially, I tried adding dry raw umber pigment to a dilute shellac and methylated spirits solution (15%), which I then applied in thin consecutive layers. The benefit of this was that it did not solubilise the gilding. However, I found that the shellac dried too orange in tone and so was discounted. Next, I tried using acrylic paint to patinate the appearance of dirt, a method that this worked well. Sensitive areas were first sealed using a 5% Paraloid B72 in ethanol solution to protect the gold from the paint (Searle 2016).
In order to aesthetically integrate the overall design, I decided to inpaint the missing scrollwork ornament on top of pretoned sanded infills. This was a new technique for me, and one that proved very effective! While it would be most ideal to cast and replace the missing ornaments, this technique effectively reduced the distracting appearance of the areas of loss until such a time that new ornaments can be cast.
Overall, I am really happy with how the project ran. Not only am I pleased with the results which effectively represent the original design of the frame, but I had the opportunity to learn some new techniques involved in frames conservation. The treatment took me through general skills such as cleaning and consolidation right through to specialised techniques in making compo, casting and gilding, and I’m very grateful for the opportunity to continue developing these skills. I hope to continue working on the frame beyond the scope of the project, and look forward to one day rehousing Dr Busby in his fully conserved original frame. Watch this space!
Acknowledgements
The Grimwade Centre for Cultural Materials Conservation would like to acknowledge Bathurst Regional Council and the Bathurst District Historical Society for supporting our cultural materials conservation and our student projects.
Huge thanks to Holly McGowan Jackson (Head of Frames and Furniture Conservation, National Gallery of Victoria) and Jordi Casasayas (Frames Conservator, Grimwade Centre for Cultural Materials Conservation Commercial Services) for spending the time teaching me how to make compo and for their advice throughout. Special thanks to Jordi who lent me materials and was an invaluable source of guidance throughout my decision making. Thanks also to Dr Nicole Tse and Jenny Dickens for their advice, and Claire Rowson and Rehan Scharenguivel for helping me with the photography.
Bibliography
Koob, S P 2006, ‘Conservation and Care of Glass Objects’, Archetype Publications, London.
Newberry, T 2002, ‘Frames and Framing’, Ashmolean Museum, Oxford.
Payne, J 2007, ‘Framing the Nineteenth Century’, The Images Publishing Group Pty Ltd, Victoria.
Rivers, S and Umney, N 2003, ‘Conservation of Furniture’, Butterworth-Heinemann, Burlington.
Searle, M 2016, ‘A 19th century British compo frame: a flexibly traditional approach to conservation’, blog post, 29 October, The Frame Blog, viewed 10 March 2018, <https://theframeblog.com/2016/10/29/a-19th-british-century-compo-frame-a-flexibly-traditional-approach-to-conservation/>.