Conserving Mary Goldsworthy’s ‘Geraniums’ (c. 1896)
Post by Pam R Soriano
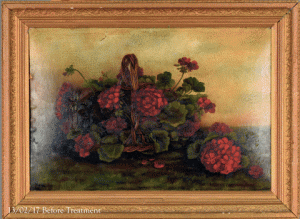 Image: ‘Geraniums’ by Mary Goldsworthy – a timelapse of treatment 2017 (click on image if timelapse not run)

In 2017, my project comes in the form of an oil painting on board by Mary Goldsworthy, entitled Geraniums. This painting dated 1896 depicts a bouquet of red geraniums arranged in a woven basket, sitting on a grassy foreground. It arrived in a gold-painted frame and in a poor but stable condition.
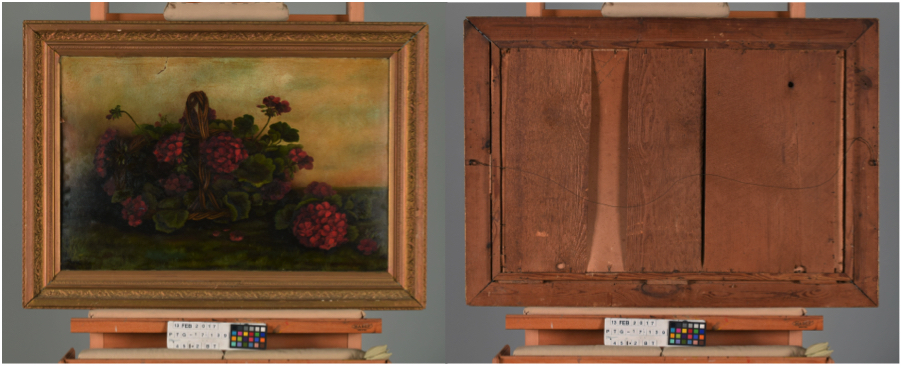
Images: Geraniums before treatment – front & back (photograph by Pamela Soriano. Images have been cropped and white balance corrected using Photoshop CS6)
The painting was created parallel to the Heidelberg School – sometimes known as the Australian Impressionists (Wells & Daniels 2012) and exhibits similarities to the style of the era including natural subject matter and landscapes. Additionally, scarlet geraniums in the 19th Century were aligned with virtue and seen as morally redeeming (Kingsbury 2016, p. 243).
To treat Goldsworthy’s Geraniums, due consideration of conservation approved methodology and professional practice was required. First, a condition report needed to be created, a treatment proposal offered to the client and (if approved) the treatment steps enacted.
_____
Step One: Examine & document the painting in a condition report
(13 Feb 2017)
The painting arrived in a poor but stable condition. The frame showed abrasion, multiple areas of loss and separation at the mitre joints. The support showed overall staining and a severe warp of the entire panel, pushing the image out creating a ‘barrel view’. The auxiliary supports (the wooden boards holding the painting in the frame) were also stained and no longer provided support; while the tacks and nails were abrading the substrate. The media layer (the paint layer) appeared to have some losses, cracks and small areas of loss particularly around the edges, while the surface coating had severely yellowed to the point where the image was dulled and lost. The entire painting and frame also arrived in a dusty condition.
 Image: Overlay image highlighting the condition of Geraniums – front (photograph by Pamela Soriano. Images have been cropped, white balanced and edited using Photoshop CS6)
Step Two: Develop a treatment plan and propose to the client
Due to the availability of time for treatment, the client was offered two options with two possible outcomes (outlined below). Option A prioritised the immediate flattening of the painting through humidification, while Option B prioritised the visibility of the image layer through varnish removal. The client approved prioritising Option B.
Option A: To improve the structural aesthetics of the painting by reducing the convex warp and rehouse it in a structurally sound frame.
Option B: To improve the chemical stability and aesthetics of the painting, including the possible removal of varnish, to prevent further deterioration.
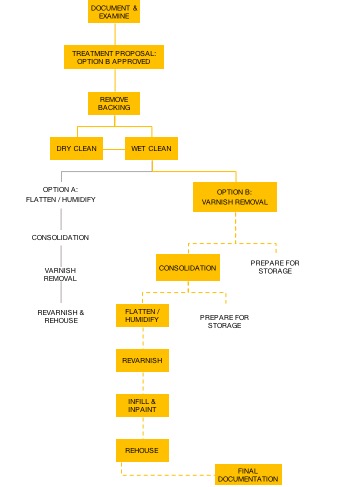
Image: Treatment pathway proposed to the client. Option B pathway is highlighted in yellow. Dotted lines indicate additional treatment that will be undertaken given time.
Step Three: Begin treatment. Remove the painting from the frame and auxiliary supports
(22 Feb 2017)
The first step was to remove the painting out of the frame so further treatment can begin. Twenty iron nails and two tacks were removed using pliers and a mount board for leverage and to protect the frame. The three auxiliary board supports were also removed and placed in a plastic bag and placed into temporary storage with the nails and tacks.
Step Four: Further documentation and condition reporting
(22 & 23 Feb)
Ultraviolet radiation revealed a white fluorescent haze over the painting suggesting the presence of an organic varnish (Nicolaus 1999, p. 328). A yellow/tan tinge also appeared over the fluorescence indicating the presence of grime or other environmental deposits.
Infrared revealed no new information but microscopy elucidated the level of dirt, a shiny surface indicating a varnish, a fine network of cracks and the colour of the ink on the back.
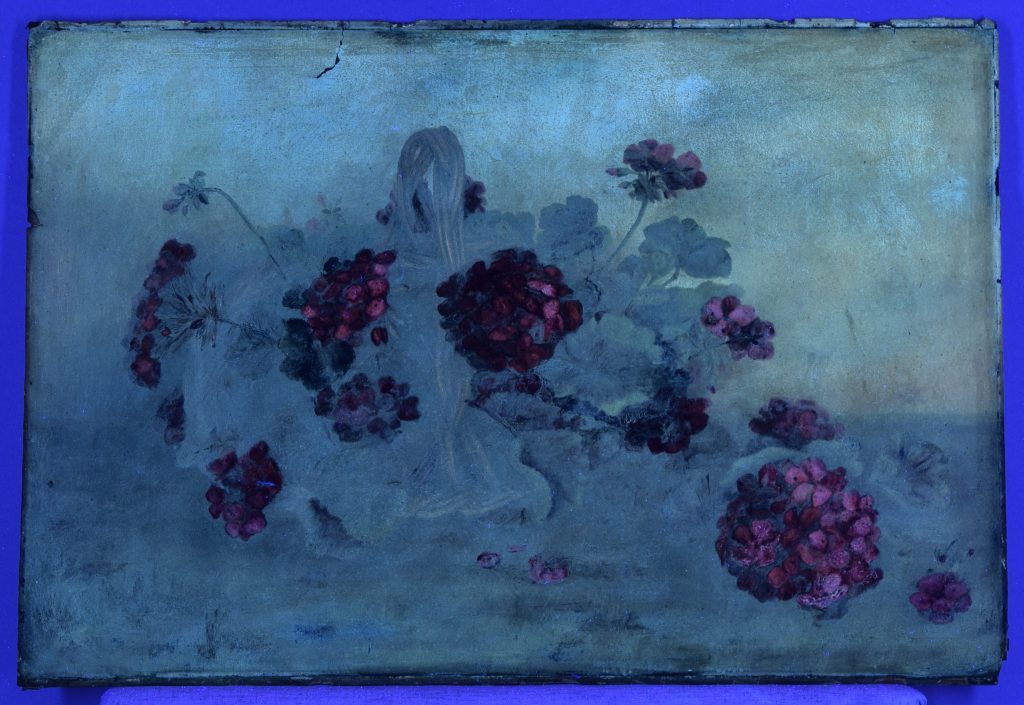
Image: Before treatment image of the painting under ultraviolet radiation (photograph by Pamela Soriano)

Step Five: Dry cleaning
(23 Feb 2017)
The next step was to remove as much of the dirt as possible using dry and mechanical cleaning methods. A smoke sponge was used to pick up the minute dust particles on the back but not the front as it was too fragile. Wet (aqueous) cleaning systems will be used on the front instead.
Step Six: Aqueous cleaning
(23, 24 & 27 Feb 2017)
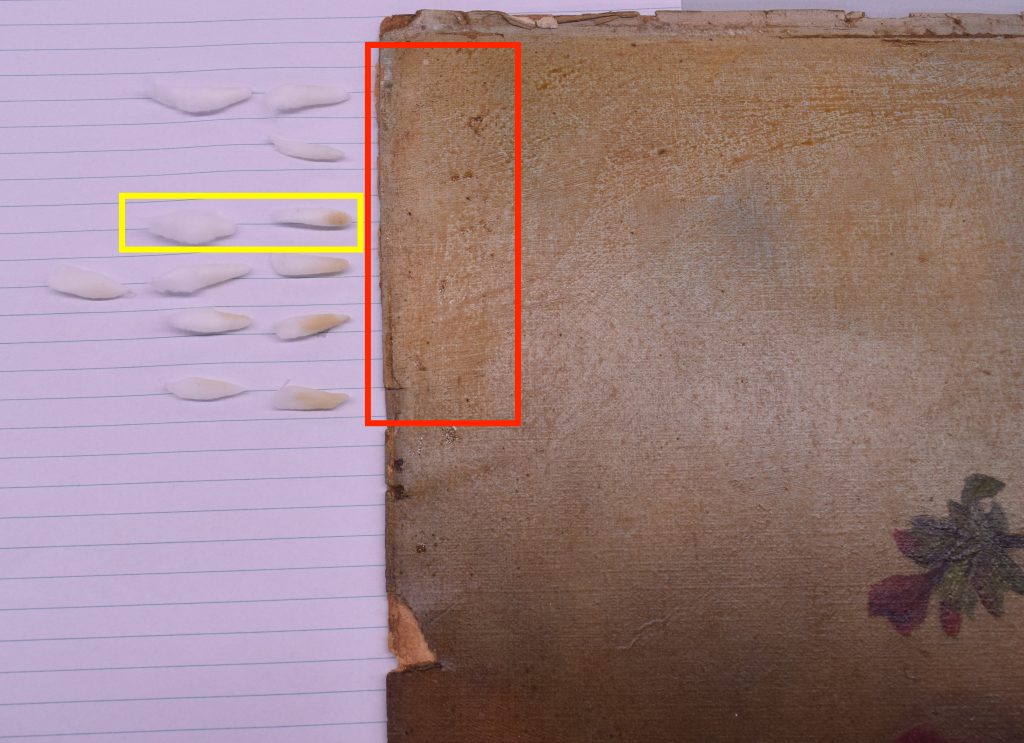 Image: aqueous cleaning testing. Red highlights the area of testing, yellow indicates enzyme results

After testing, the front of the painting was cleaned using an enzyme (my saliva!).
Step Seven: Varnish removal
(3, 8 – 10, 15 – 18, 22 & 23 Mar 2017)
Various methods for varnish removal were tested and used. As the varnish showed yellowing over time and fluoresced under ultraviolet radiation, it was likely to be a natural resin. Here are some of my results and there were many more!
 Image: Varnish removal test #1 – example of details and results recorded
METHOD: ISOPROPANOL
Initial testing revealed isopropanol in a free solvent was favourable due to its workability. In theory, this would allow me to remove the varnish with control without getting too close to the pigment layer. After cleaning a test area of 100 x 150 mm area, using various isopropanol and white spirit solutions (1:1, 1:4 and 2:3 ratios) it was evident it was too slow and the varnish removal appeared patchy.
*note, white spirit was added to slow the evaporation rate of the solvent.
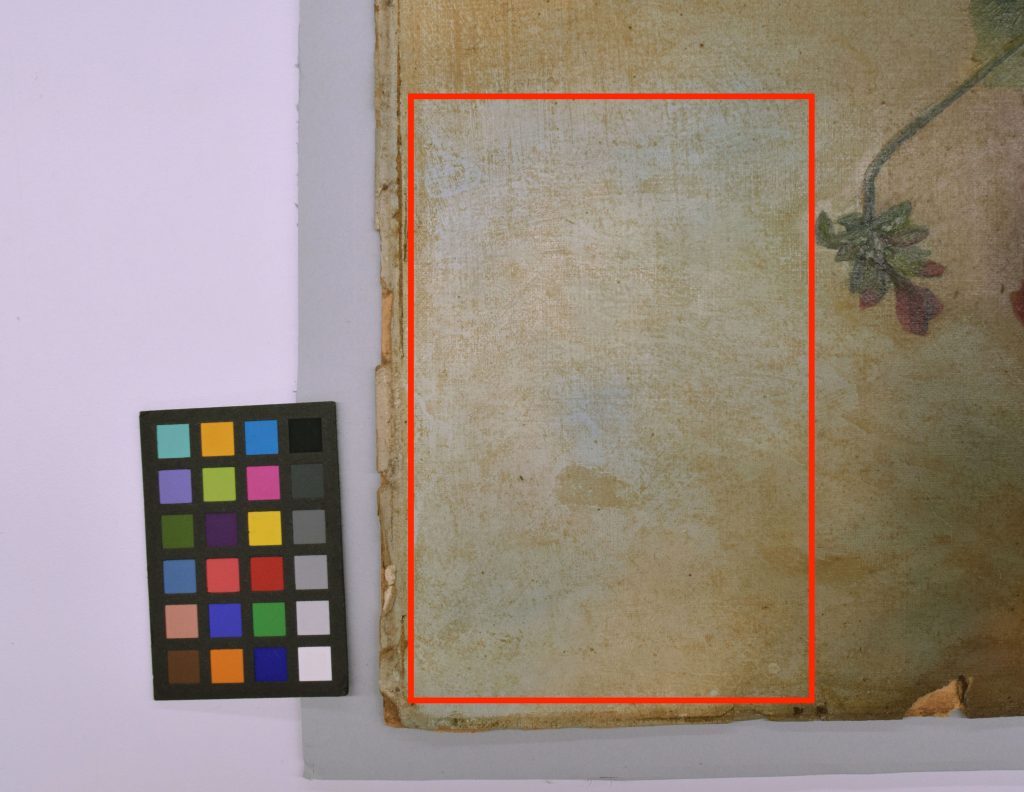 Image: during treatment, varnish removal using isopropanol (photo by Pamela Soriano)
METHOD: 1:1 ETHANOL W WHITE SPIRITS
Further testing was undertaken to find a solution that would remove the varnish effectively. Various ethanol and white spirit mixtures were tested with success (1:1, 1:4 and 2:3 ratios). 1:1 ethanol w white spirits proved the most effective, leaving minimal blanching, with an added 3 drops of diacetone per 25mL to help solubilise the oil in the varnish.
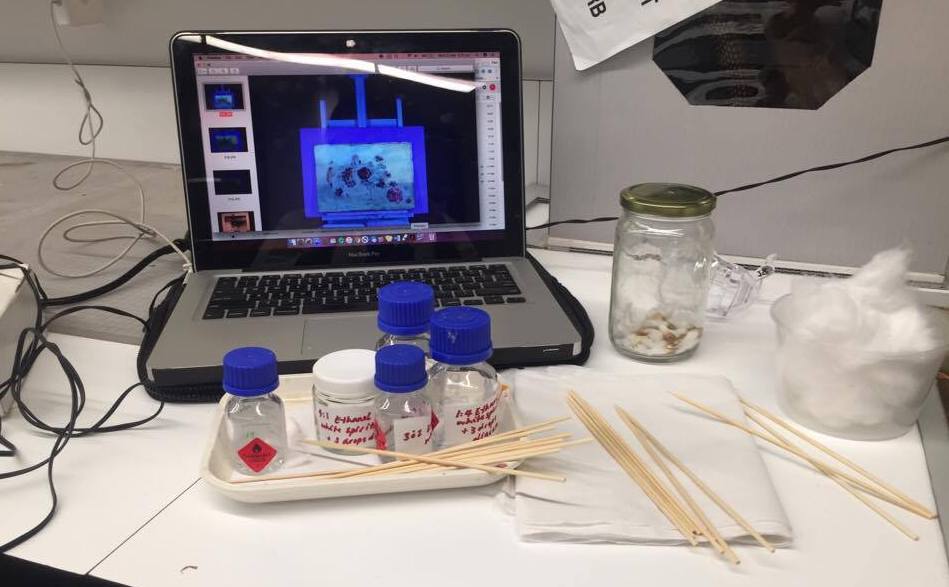 Image: Typical set-up during varnish removal – cotton wool, bamboo skewers for swabs, container for used swabs, solvents in a chemical tray and image of painting before treatment under UVR for guidance (photograph by Pamela Soriano)
METHOD: SAME SOLUTION AS ABOVE BUT PARTIAL CLEAN GOAL
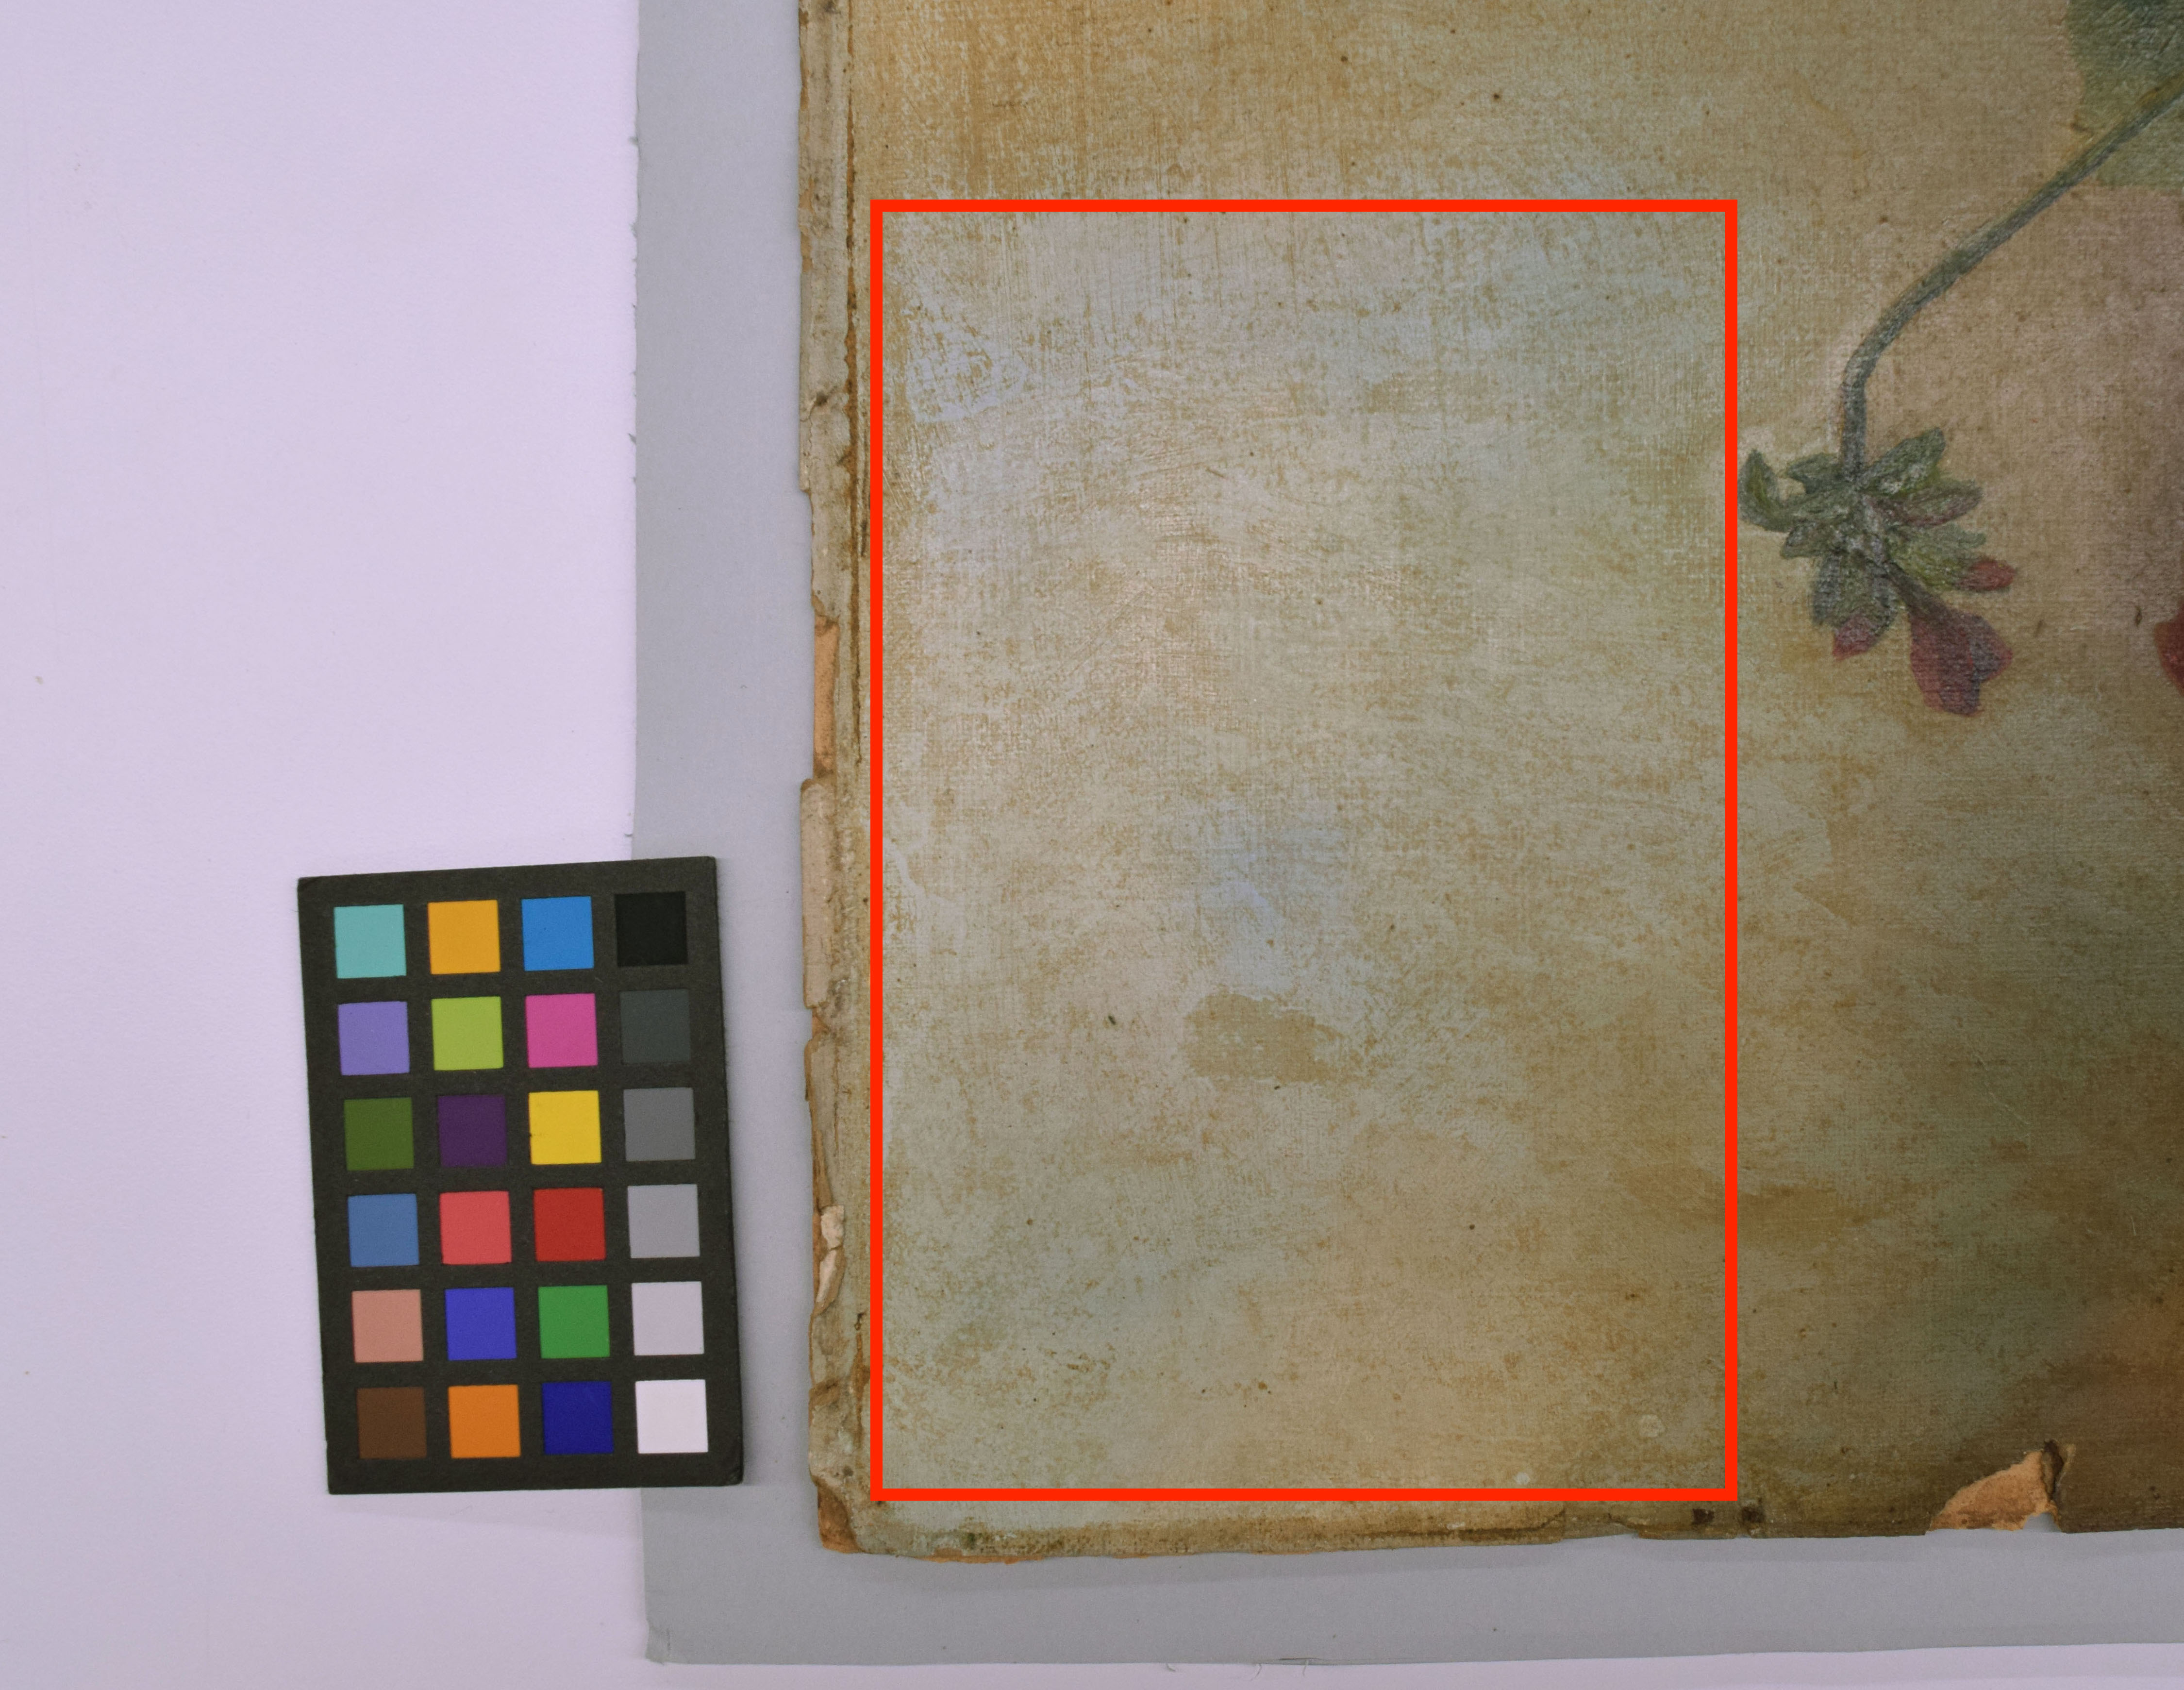
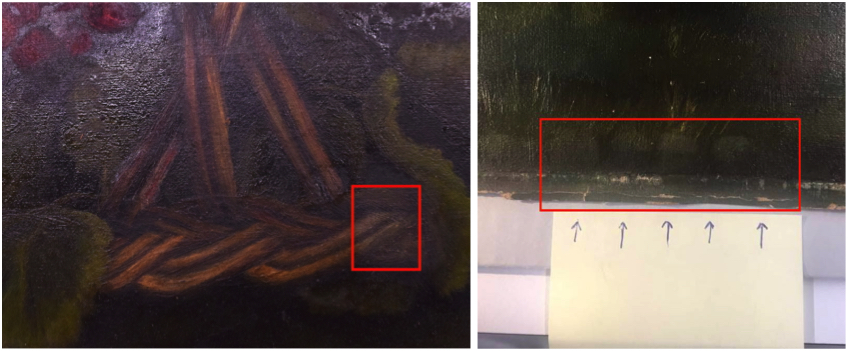 Images: Left – pigment loss highlighted in the basket areas, Right – further testing undertaken
When removing the varnish in the basket area of the painting, it was more sensitive and extra care needed to be taken with a partial varnish removal.
 Image: During treatment image of the painting under ultraviolet radiation (photograph by Pamela Soriano). Highlights the partial clean goal – sky now appears clearer under UVR while the dark paint layers are still dulled
Step eight: Attempt to locally humidify edges for flattening and consolidation
(28 Mar 2017)
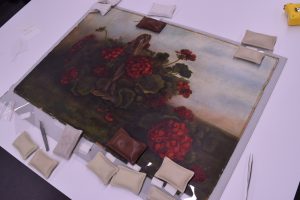
Image: Localised humidification

Humidification in localised areas was attempted but not achieved using a Mylar, Tyvek, blotter and Gore-tex ‘pocket’ with weights securing the edges (see image above). The areas of target were the edges where the painting had folded over unto itself. After twenty hours of humidification, the substrate was sufficiently humidified but the paint film bonding the edges faces together was stronger than the fibres of the substrate and subsequently, when it was attempted to lift the folded edges off the painting, the edges broke off.
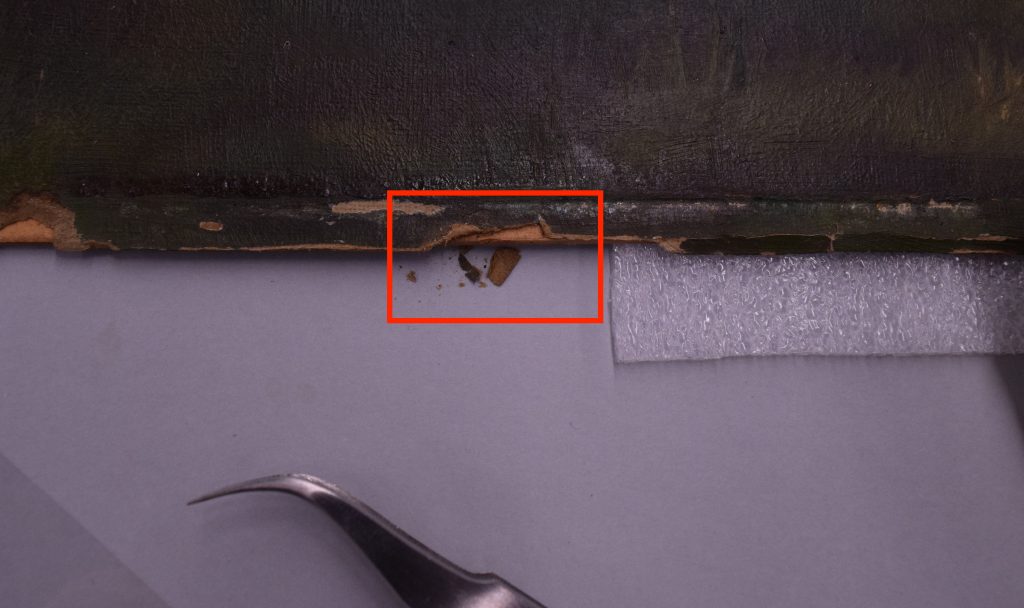 Image: lost edge after humidification attempt (photograph by Pamela Soriano. Image has been cropped and edited in Photoshop)

Step nine: Storage box created to house and protect the painting
(31 Mar 2017)
 Images: Geraniums purpose-built storage box (photograph by Pamela Soriano. Image has been cropped in Photoshop CS6).
_____
 Image: Geraniums after treatment – front & back (Photograph by Pamela Soriano. Images have been cropped and white balance corrected using Photoshop CS6)
‘Geraniums’ by Mary Goldsworthy arrived in a poor condition. There were multiple areas for improvement with the most pressing being the lack of visibility of the image. Conservation can chance the social meaning attributed to an object (Eastop 2011, pp. 426). In this instance, the painting aged and lost its original meaning; the varnish yellowed while oily deposits built up on the surface. Subsequently, the colours were dulled, the shadows were lost and instead of a bright, vibrant bouquet of flowers awash in sunlight, the image appeared to be a lacklustre still-life portrait dulled in sunset tones. Treatment undertaken sought to rectify this loss of meaning and bring the image to the forefront.
As a student, this project was immensely beneficial to my learning and growth. I experienced the propitious highs of a satisfactory varnish removal, the debilitating low of removing pigment and developed problem-solving skills to mitigate against further loss.
_____
REFERENCES
Eastop, D 2011, ‘Conservation practice as enacted ethics’ in J Marstine (ed.) The Routledge Companion to Museum Ethics. Redefining Ethics for the Twenty-First Century, Routledge, London, pp.426-44.
Florian, ME, Kronkright, DP, & Norton, RE 1990, The conservation of artifacts made from plant materials, Getty Conservation Institute.
Hedley, G 1993, ‘The Practicalities of the Interaction of Moisture with Oil Paintings on Canvas’ in Measured Opinions, Hedley, G (ed.), UKIC, London, pp. 112-122.
Hodges, H 2000, Artifacts : an introduction to early materials and technology, Duckworth, London.
Kingsbury, N 2016, Garden Flora: The Natural and Cultural History of the Plants in Your Garden, Timber Press, Inc., Portland.
Nicolaus, K 1999, The Restoration of Paintings, Konemann Verlagsgesellschaft, Cologne
Phenix, A 1993, ‘Artists’ and conservation varnishes: an historical overview’, in Radfield, S (ed,), Varnishing: theory and practice: pre-prints of 50th anniversary conference of Association of British Picture Restorer, London, September, (pp. 361-375),Association of British Restorers, Kew.
Stavaroudis, C & Blank, S 1989, ‘Solvents & sensibility’, WACC Newsletter, vol.11, No. 2, pp. 2-10, viewed 08 April 2017, <http://coolpalimpsest.stanford.edu/waac/wn/wn11/wn11-2/wn11-202.html>
Wells, K & Daniell J 2012, ‘Contemporary Australian Art’, The Australian Government, viewed 9 April 2017, <http://www.australia.gov.au/about-australia/australian-story/contemporary-austn-art>