Cooking with DOS: Converting Images to PDF
Do you scan documents with your camera? In this post we’ll whip up some Imagemagick scripts to not only convert folders of images to PDFs but also apply a range of image processing similar to that used business document scanners at the same time.
TL:DR
Converting folders of images to PDFs can be done easily with a few drag and drop scripts. The download file for this post contains sample images and scripts to convert a single image, a folder of images or a folder containing multiple folders of images to BW or colour PDFs. Please read the Readme text file as you will need to set the temporary folder location (unless you’ve copied my setup). Download the sample images and scripts (12MB)
Preparation
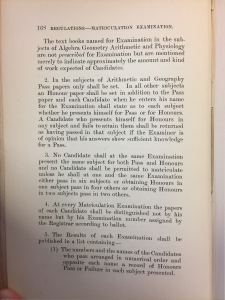
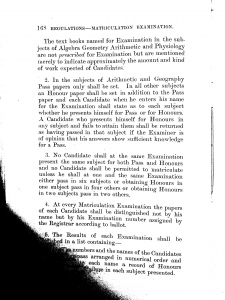
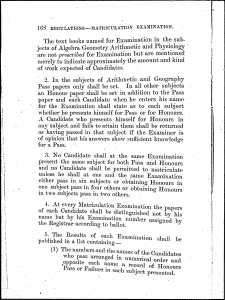
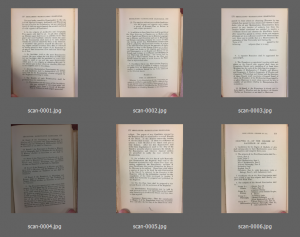
The images I’ll be using for this is a short series of photos of a small book with an iPhone6 on a table in the office. To help illustrate the processing steps this set includes some deliberate problems including a shadow across the page, a crooked page and an underexposed image. If you want to play along you can download the original images.
The applications you’ll need for this are Imagemagick, Ghostscript and PDFTK as well as a temporary folder to hold intermediate files (see: Commandline tools for digitisation)
Use folders to group the images the images that you want for each PDF and name the folder with the filename that you want the PDF to have. Each of the scripts in this post are designed as a “drag and drop” script.
Output image and file sizes
Doing a straight conversion from an image to a PDF can still leave you with a very large file. Which image size you choose depends on what you what to use the PDF for. The examples below will aim for an image the equivalent of A4 at 200dpi (JPEG compression with 35% quality) for colour and 300dpi (CCITT Group 4 compression) for BW for a readable PDF with a small file size.
In order for the PDF to display and print at the expected size it will also be necessary to define the resolution of the image.
To help decide which compression method and quality settings to use the script download includes a script that produces a range of compression settings for both JPEG and JPEG2000. The amount of compression artefacts will be the main deciding factor. When deciding on a single setting to use for all images you should test this script with:
- a text only page
- a page with an image
- a page with low contrast
Orientation
Orientation sensors on camera don’t function when the camera is pointing straight down which is how most people scan pages. It is best to turn this option off if possible and keep your camera in the same orientation while taking photos. Inevitably though, you will probably need to change the orientation of the page. This can be done in a variety of ways including:
- Rick click on an image in Windows Explorer and choose a rotation option
- Rotate the image in Adobe Bridge
The scripts on this page will rotate the image correctly for either of these two methods via “-auto-orient”. This reads a metadata flag that specifies the rotation to be applied before viewing/processing the image.
As an alternative you could use a fixed rotation if all of your images have the same orientation.
Colour PDFs
For our basic conversion we want to do the following steps for each image:
- (optional) apply a basic colour correction
- (optional) deskew and crop the image
- resize the image (only if bigger than the output size)
- sharpen the image a little
- set the resolution
- save the image as a PDF
magick %1 -auto-orient -auto-level -set option:deskew:auto-crop true ^
-deskew 40%% -resize 2340x2340^> -unsharp 1.5x1+0.7+0.02 ^
-density 200 -compress JPEG -quality 30%% "TEMP_DIR\%~n1.pdf"

Bitonal BW PDFs
Converting images to BW can significantly reduce the file size of an image and is particularly useful for text only pages. Most business document scanners have a variety of algorithms for converting colour to BW which can accommodate a wide range of original items.
A basic BW conversion uses a simple threshold, making everything below an intensity of 50% black and everything over white. Without the auto-level operation the under-exposed image in this set would be completely black.
magick %1 -auto-orient -auto-level -resize 3500x3500^> ^
-unsharp 1.5x1+0.7+0.02 -set option:deskew:auto-crop true ^
-deskew 40%% -colorspace gray -threshold 50%% -depth 1 ^
-compress Group4 "TEMP_DIR\%~n1.pdf"
Uneven shading on an image, especially shadows across content can be problematic and is only useful with well printed pages with good lighting.

ImageMagick also has an adaptive threshold operation which compares each pixel with the average pixel value of a specified area around it. This is useful for dealing with shadows near the spine of a book as well as shadows or staining on pages. White text on a black background will become white text with a black outline, with large areas of black becoming white.
magick %1 -auto-orient -auto-level -resize 3500x3500^> ^
-unsharp 1.5x1+0.7+0.02 -set option:deskew:auto-crop true ^
-deskew 40%% -colorspace gray -lat 30x30-5%% -shave 1 ^
-threshold 50%% -depth 1 -compress Group4 "TEMP_DIR\%~n1.pdf"

The conversion to BW also tends to generate an amount of noise and edge artefacts. While it is generally not necessary to clean these up for performing OCR it makes the pages a bit more pleasant to read. To clean up the image we can remove all black spots below a certain size (don’t want remove the dots on “i”s)
...
-define connected-components:mean-color=true ^
-define connected-components:area-threshold=12 ^
-connected-components 4 ^
...
and any black page edges (assuming no text or content reaches the edge of the image) by adding a black border to the page and then filling this (and any adjoining black pixels) with white.
...
-bordercolor black -border 2 -fuzz 0%% -fill white ^
-draw "color 0,0 floodfill" ^
-shave 1
...
This bring our final command line to:
magick %1 -auto-orient -auto-level -resize 3500x3500^> ^
-unsharp 1.5x1+0.7+0.02 -set option:deskew:auto-crop true ^
-deskew 40%% -shave 1 -colorspace gray -lat 30x30-5%% ^
-threshold 50%% -define connected-components:mean-color=true ^
-define connected-components:area-threshold=12 ^
-connected-components 4 -bordercolor black -border 2 -fuzz 0%% ^
-fill white -draw "color 0,0 floodfill" -shave 1 -depth 1 ^
-compress Group4 "TEMP_DIR\%~n1.pdf"
- Breakdown and Tweaks
Generic processing
-auto-orient : Rotate the image according to the setting in EXIF:Orientation metadata in the image. Can be removed if this metadata is not present. Rotations in Adobe Bridge use this field. Rotations in IrfanView and Windows Explorer rotate the image and remove this field.
-auto-level : Normalises the RGB channels of the image without any clipping. This can be considered as a basic colour/contrast correction but may produceundesirable results in some circumstances. Use -contrast-stretch if you want to increase the contrast further.
-resize 3500x3500^> : Resize the image to fit within 3500x3500 pixels (for A4 @ 300DPI) only if the image is larger than this. For A4 @ 200DPI use 2340x2340.
-unsharp 1.5x1+0.7+0.02 : Performs a minor sharpening after resizing the image.
-set option:deskew:auto-crop true : Crop the rotated image to compensate for the increase in image size caused by rotation. Set to false to prevent this. Applies to the following deskew command.-deskew 40%% : deskew the image (default setting) Using smaller numbers reduces the maximum rotation that will be performed. This may be useful if all images are kept relatively straight during capture.
BW processing
-colorspace gray : Process the image as greyscale
-lat 30x30-5%% : Adaptive threshold for an area of 30x30 pixels with an offest of -5%. Increasing the area will retain larger areas of black (if required) but processing will become increasingly slower at values >50. Offset is negative to produce black on white background. Positive offests produce white on a black background. Smaller offest values will reduce the size of gaps in letters where ink is faded but will also increase noise. Typical values are -5% to -15% depending on the quality of the printing.-threshold 50%% : Force the image to be bitonal but possibly redundant
-depth 1 :Set the bit depth to 2^1 (bitonal BW)
Noise removal
-define connected-components:mean-color=true : Use for noise reduction. Saves a few extra manipulations so just leave it as is.
-define connected-components:area-threshold=12 : Maximum size of particle to remove (area in pixels)
-connected-components 4 :Border cleanup (nothing to tweak here, leave or delete)
-shave 1 : Reduce the image size by 1 pixel from each edge. (-lat may leave a 1 pixel wide white border around the edge)
-bordercolor black -border 2 : Add a 2 pixel wide black border around the image. This connects any black areas on the edge of the image together
-fuzz 0%% -fill white -draw "color 0,0 floodfill" : Fill all black pixels joined to the top left corner of the image with white.
-shave 1 : Restores the image to its original size
Compression
-compress METHOD : Recommend "Group4" for BW, "JPEG" or "JPEG2000" for colour/greyscale (without the quotes)
-quality NN : Specify the amount of compression for JPEG/JPEG2000 as a percentage of image quality. 1 – 100, smallest to largest file size.
Converting a whole folder of images
Now it’s time to convert a whole folder of images and merge the pages to a multi-page PDF. Our process for this is:
- clear the temporary folder of all existing files
- convert every image in a folder to a PDF file in the temporary folder
- merge all of the PDF files in the temporary folder
- save the PDF in the same location as the folder of source images, using the source folder name as the filename
- (Optional) delete all of the PDFs in the temporary folder
Using the adaptive BW conversion above gives us:
del "TEMP_DIR\*.pdf"

FOR %%a in ("%~1\*.*") DO magick %%a -auto-orient -auto-level ^
-resize 3500x3500^> -unsharp 1.5x1+0.7+0.02 ^
-set option:deskew:auto-crop true -deskew 40%% -shave 1 ^
-colorspace gray -lat 30x30-5%% -threshold 50%% ^
-define connected-components:mean-color=true ^
-define connected-components:area-threshold=12 ^
-connected-components 4 -bordercolor black -border 2 -fuzz 0%% ^
-fill white -draw "color 0,0 floodfill" -depth 1 ^
-compress Group4 "TEMP_DIR\%%~na.pdf"

c:\tools\pdftk\pdftk.exe "TEMP_DIR\*.pdf" cat output "%~dpn1.pdf" dont_ask
del "TEMP_DIR\*.pdf"
Processing several folders at once
To go one step further, we can create a second script to create a PDF for each subfolder within a folder. While this could easily be done using nested FOR loops in a single script, I split the loops across two scripts. Any tweaks to the PDF conversion only need to be made in one script with this setup. This assumes both scripts are in the same folder.
FOR /D %%b in ("%1\*.*") DO start /wait %~dp0CONVERT_FOLDER_SCRIPT "%%b
Sample scripts
The download file for this post also includes a script folder of our production versions.
- aaReadMe.txt : Notes on adjusting the different ImageMagick commands used in the scripts.
- folder2pdf-bw.bat : Convert a folder of images to a 300DPI BW PDF
- folder2pdf-bw-loop.bat : Convert all subfolders within a folder to 300DPI BW PDFs
- folder2pdf-colour.bat : Convert a folder of images to a 200DPI colour PDF
- folder2pdf-colour-loop.bat : Convert all subfolders within a folder to 200DPI colour PDFs
- image2pdf-bw.bat : Convert a single image to a 300DPI BW PDF
- image2pdf-colour.bat : Convert a single image to a 200DPI colour PDF
- pdf-compress-compare.bat : convert an image into several colour PDFs with varying compression settings for both JPEG and JPEG2000 to assist with selecting a “preferred” compression method and amount.
Categories

Leave a Reply