Memoirs of a Great Jar
By Sholeh Magzub, Student objects conservator completing a Masters in Cultural Materials Conservation at the University of Melbourne, Australia.
The First Steps: Making Treatment Decisions for an Ancient Egyptian Jar
An integral part of any conservation treatment is the undertaking of a decision-making process which takes into consideration ethical and practical factors. Conservators are often required to balance the needs of the stakeholders, the artist’s intent, and ethical conservation standards throughout the planning and implementation of their treatments.
Within an Australian context, these ethical standards are provided by the Australian Institute for the Conservation of Cultural Materials (AICCM) Code of Ethics and Code of Practice (2002), which delineates a detailed approach for holistic and ethical professional practices of conservation.
As a student conservator at the University of Melbourne, Australia, this code of ethics took a front seat in guiding the treatment plan designed for the conservation of an Egyptian beer jar in the university’s collection.


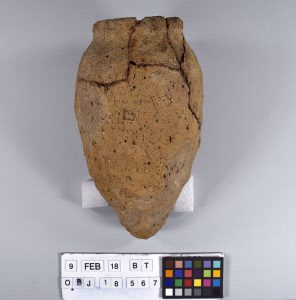
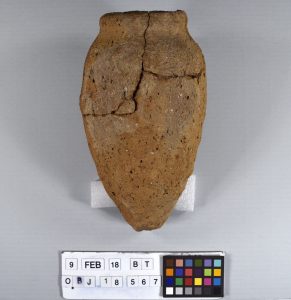
Figure 1- Four side profiles of the Egyptian jar with pointed base before commencing treatment. Photographs by Sholeh Magzub.
I must admit that I was immediately confronted by the age of the vessel. This particular piece of functional ceramic was manufactured in the Predynastic period of Egyptian antiquity (3000-2686 BCE), making it at least 5000 years old. Instead of feeling intimidated by its age, I used this incredible information to ascertain the best way for it to, hopefully, survive 5000 more.

Figure 2- Detail photograph of evidence of use on the interior of Egyptian jar with pointed base. Photograph by Sholeh Magzub
In order to commence the planning of the treatment, it was necessary to understand the issues that would underpin my treatment decisions. This required documentation, research, and testing. Accompanying documentation showed that the object was both displayed in an archaeological collection and was used as a teaching tool for students of archaeology and classics. Thus, my treatment included the need for an improvement on the object’s aesthetics and, more importantly, greater stability as this vessel would be handled by professors and students.
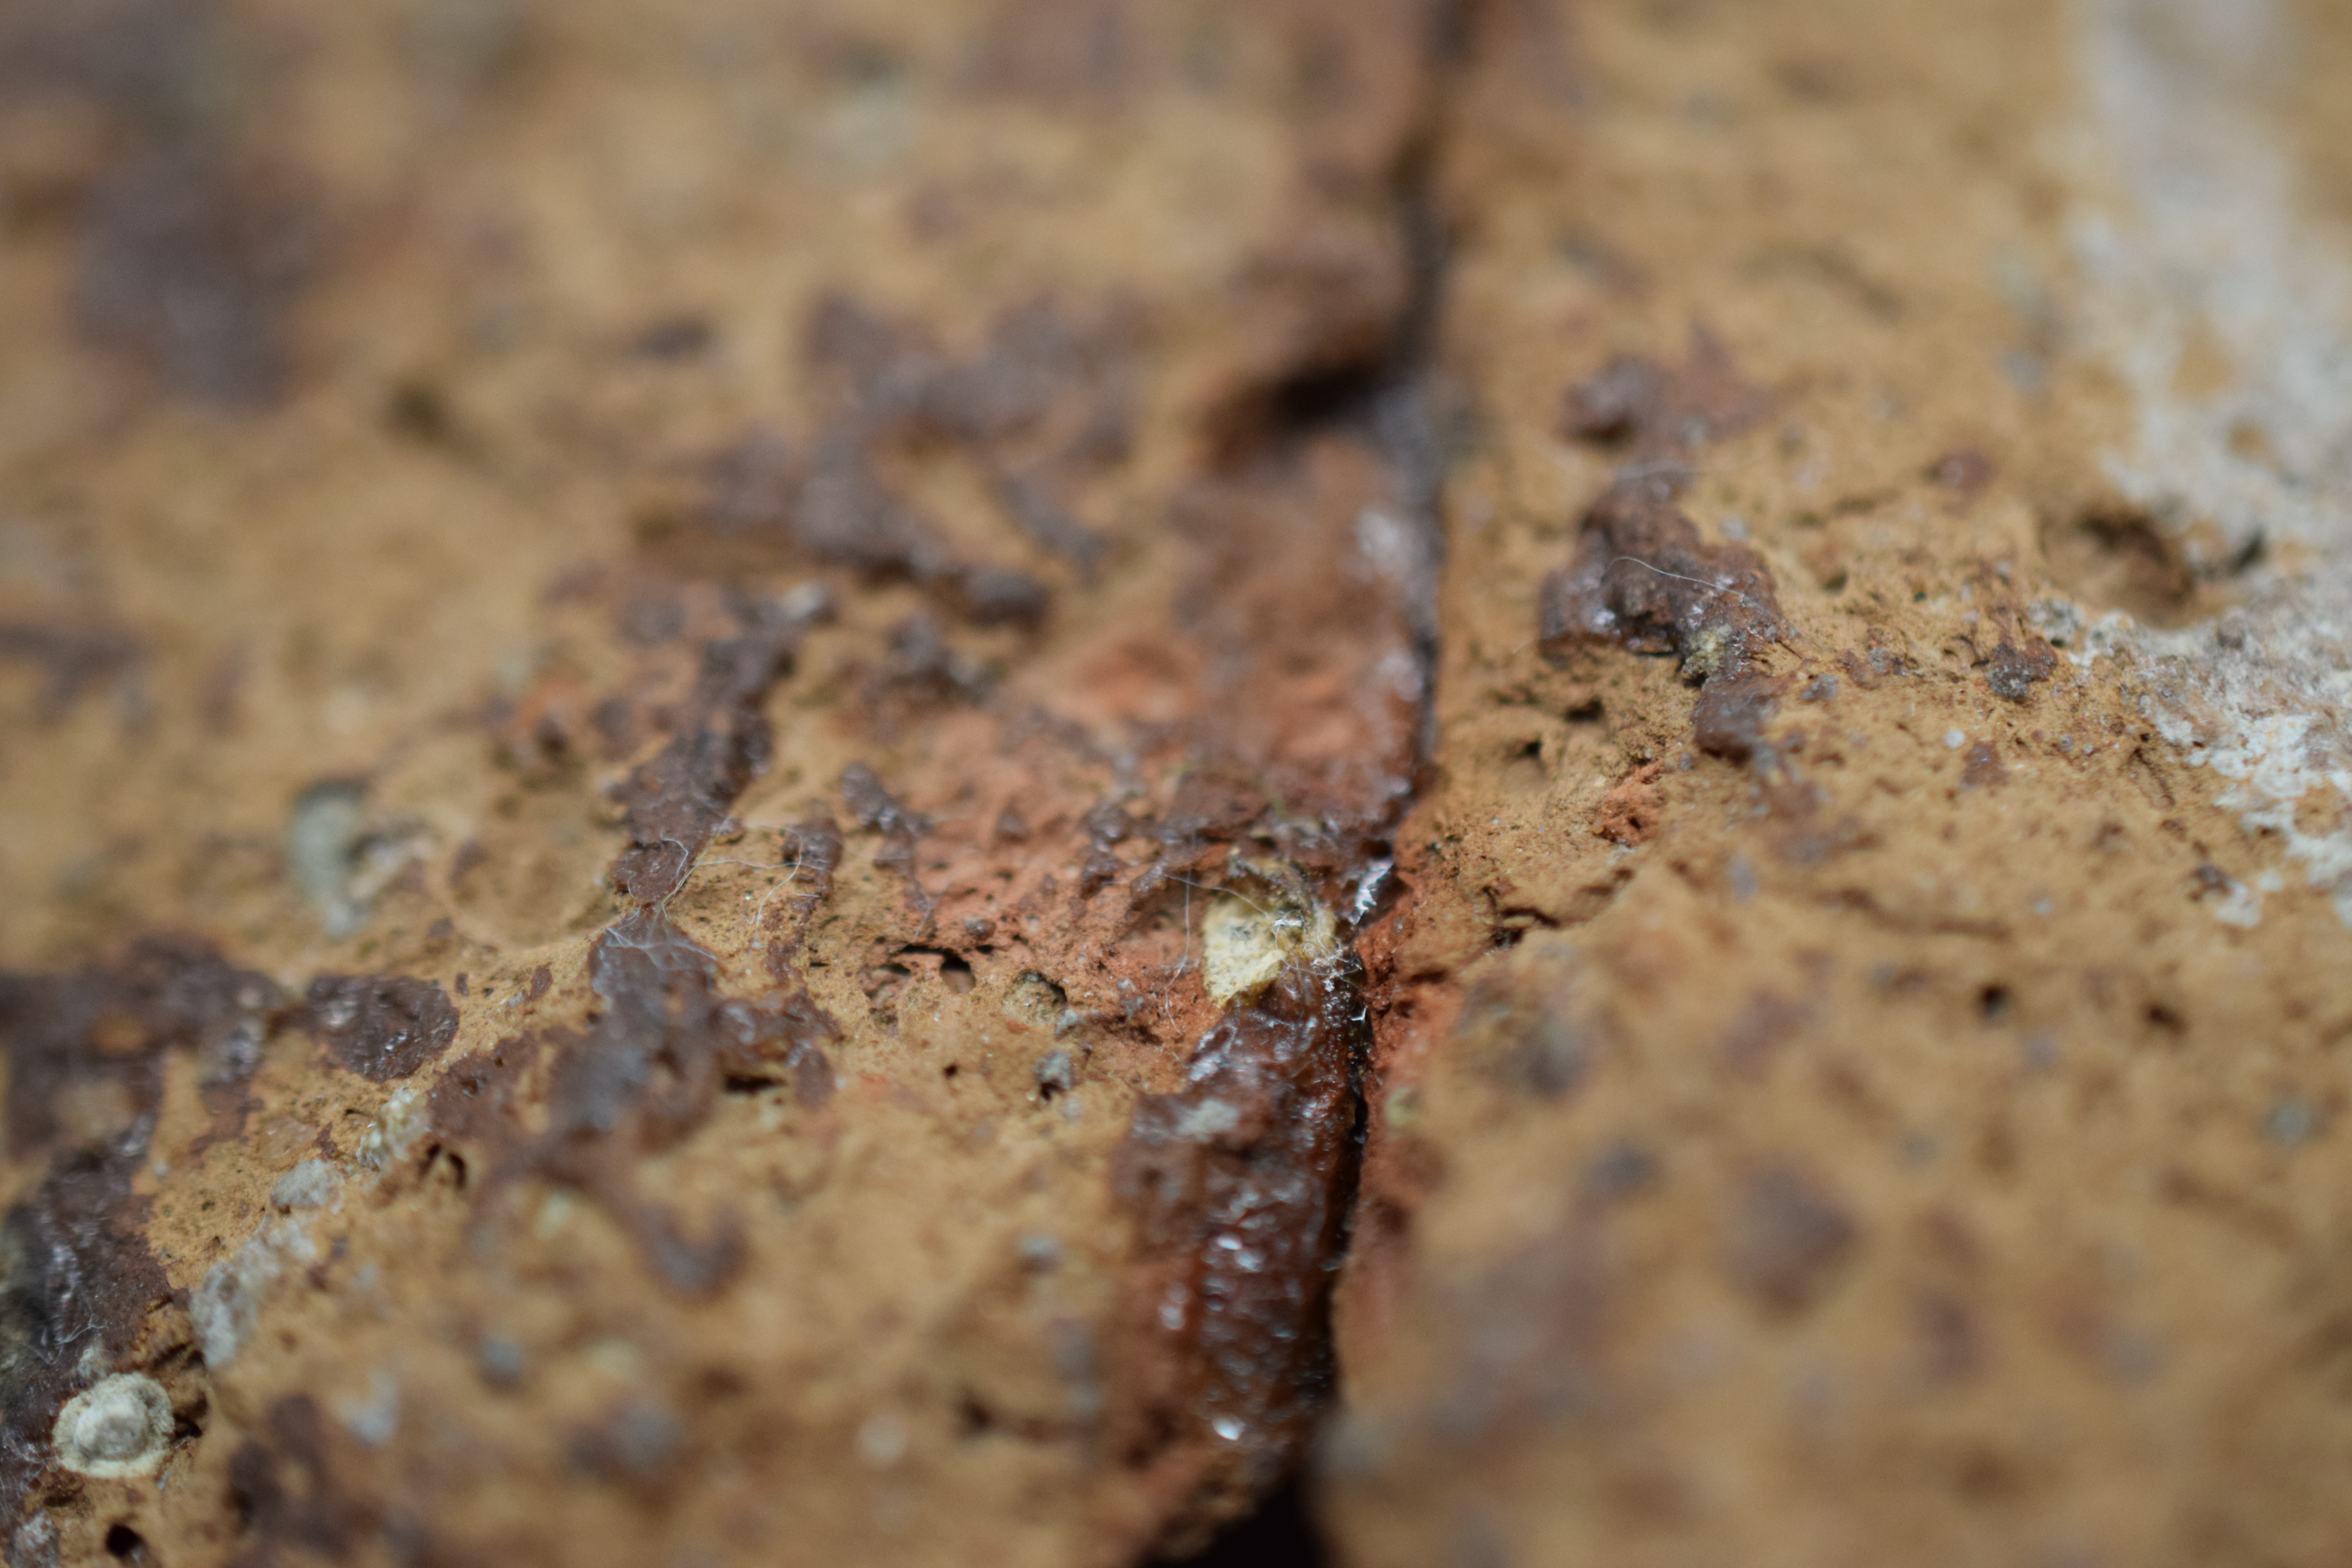
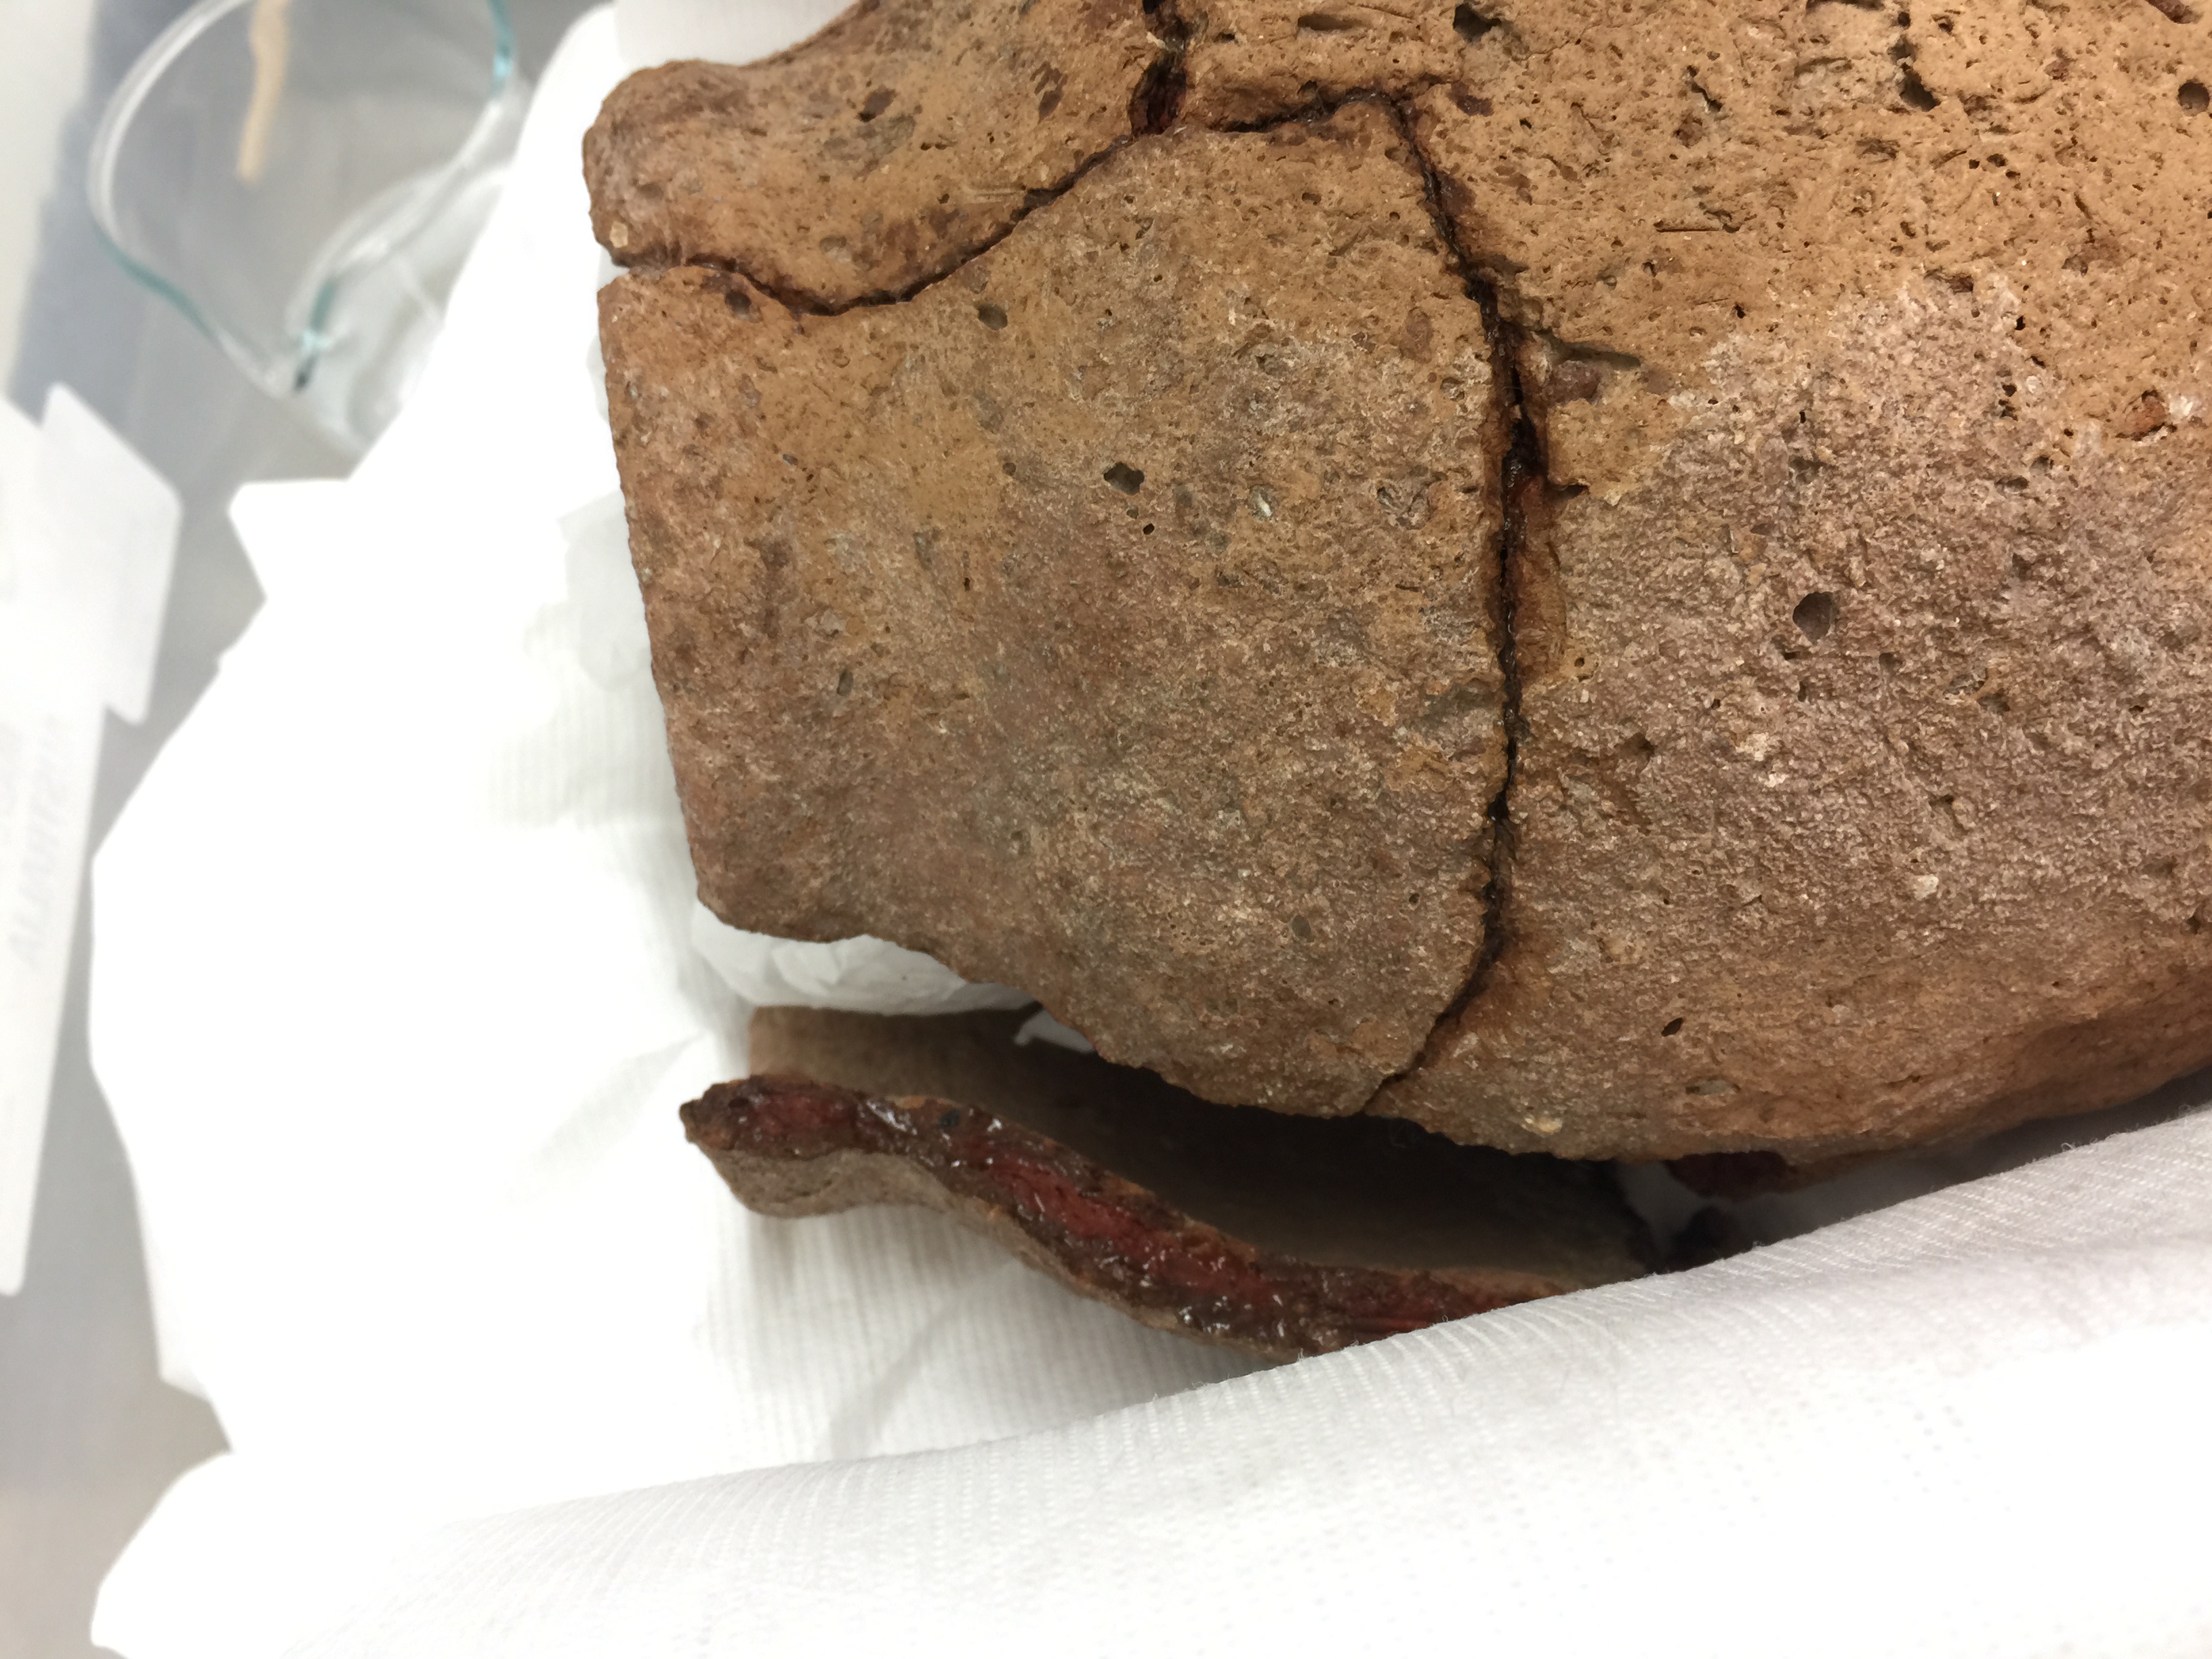
Figure 3- Detail of adhesive residue in joins and on surface of object. Photograph by Sholeh Magzub.
The presence of two adhesives on the object revealed that at least two previous repairs had taken place. This was discovered using ultraviolet fluorescence photography and performing solubility testing on the adhesives. The comparison of spectra peaks to known samples using FTIR-ATR affirmed the presence of an animal glue and Paraloid B-72.
The animal glue has deteriorated over time, resulting in an unsightly dark brown residue easily seen in the joins and on the pot’s surface (see figure 3). As the vessel is a low fired ceramic, the greater concern is the fact that deteriorating animal glue can shrink and pull apart the clay body – evidence of which can already be seen in some joins.
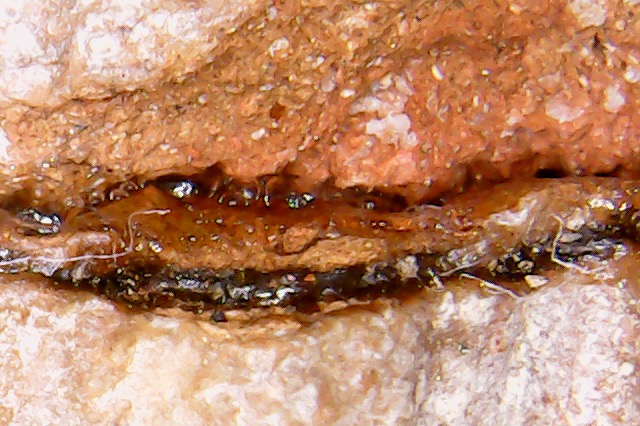
Figure 4- Microscopic image of clay breakage in shrinking animal glue. Photograph taken using digital microscopy, by Sholeh Magzub.
In an attempt to stabilize the object, and minimize the risk of further damage by the deteriorating adhesives, I made the following treatment decisions*:
- Current joins should be released to provide for safe treatment and removal of existing adhesives. This will be performed by using a solvent vapour chamber containing acetone to slowly coax apart the joins. Flushing the joins with solvents will be avoided as it may cause residual absorption into the clay body.
- Adhesive residue in the joins and on the surface should be removed using a combination of solvents and mechanical removal techniques. This may include the use of solvent gels, scalpels, and bamboo sticks. Cotton swabs will be avoided as it may leave residual cotton fibres.
- Where necessary, vulnerable areas should be consolidated using a low concentration of Paraloid B-72 in acetone, applied with a brush or through injection.
- The object will be re-joined using a dilute of 40% Paraloid B-72 in acetone.
*The above mentioned steps were decided upon in consultation with conservation experts and reference to conservation literature; However, like all treatments, a measure of flexibility must be adopted in the event of a treatment objective failing or not providing the safest outcome for the object.
The Object in Pieces: Using a Solvent Vapour Chamber to Open the Joins
After thorough investigation into the treatment issues of the Egyptian jar, it was decided that the best course of treatment would be to open the existing joins and remove residual adhesives from the two prior treatments. This required a great deal of planning in preparation for the disassembly of the object.

Figure 1- Diagrammatic maps of numbered pieces and their location on the object to be used in reassembly of object. Photographs and maps by Sholeh Magzub.
But how would these joins be softened in the safest way to maintain the integrity of the vessel? Several options were explored, which included a flooding of the joins with acetone to reactivate the acrylic resin (Paraloid-B72). As the jar is a low-fired, and highly porous ceramic, this option was ruled out as it would allow for unoriginal and potentially damaging material to penetrate into the clay body. The second option was to heat the joins using low, but continuous heat from a hairdryer. With the low melting point (Tg) of 40 degrees Celsius. Paraloid B-72 can easily come apart using this method. After testing this approach on several sample ceramics, this option was ruled out as there was no safe way of gauging how and when the joins might open.
Through literature review and consultation with ceramic conservation experts, it was decided that a solvent vapour chamber would provide the safest means to reactivating the adhesive and releasing the joins. This chamber was created in a plastic box lined with cotton for padding, and Tyvek® to avoid contamination of the object. The interior of the pot was filled with small balls of acid free paper to support any sherds that might collapse inwardly after the adhesive softened. The sides of the object were also protected in the case of any lateral falls.
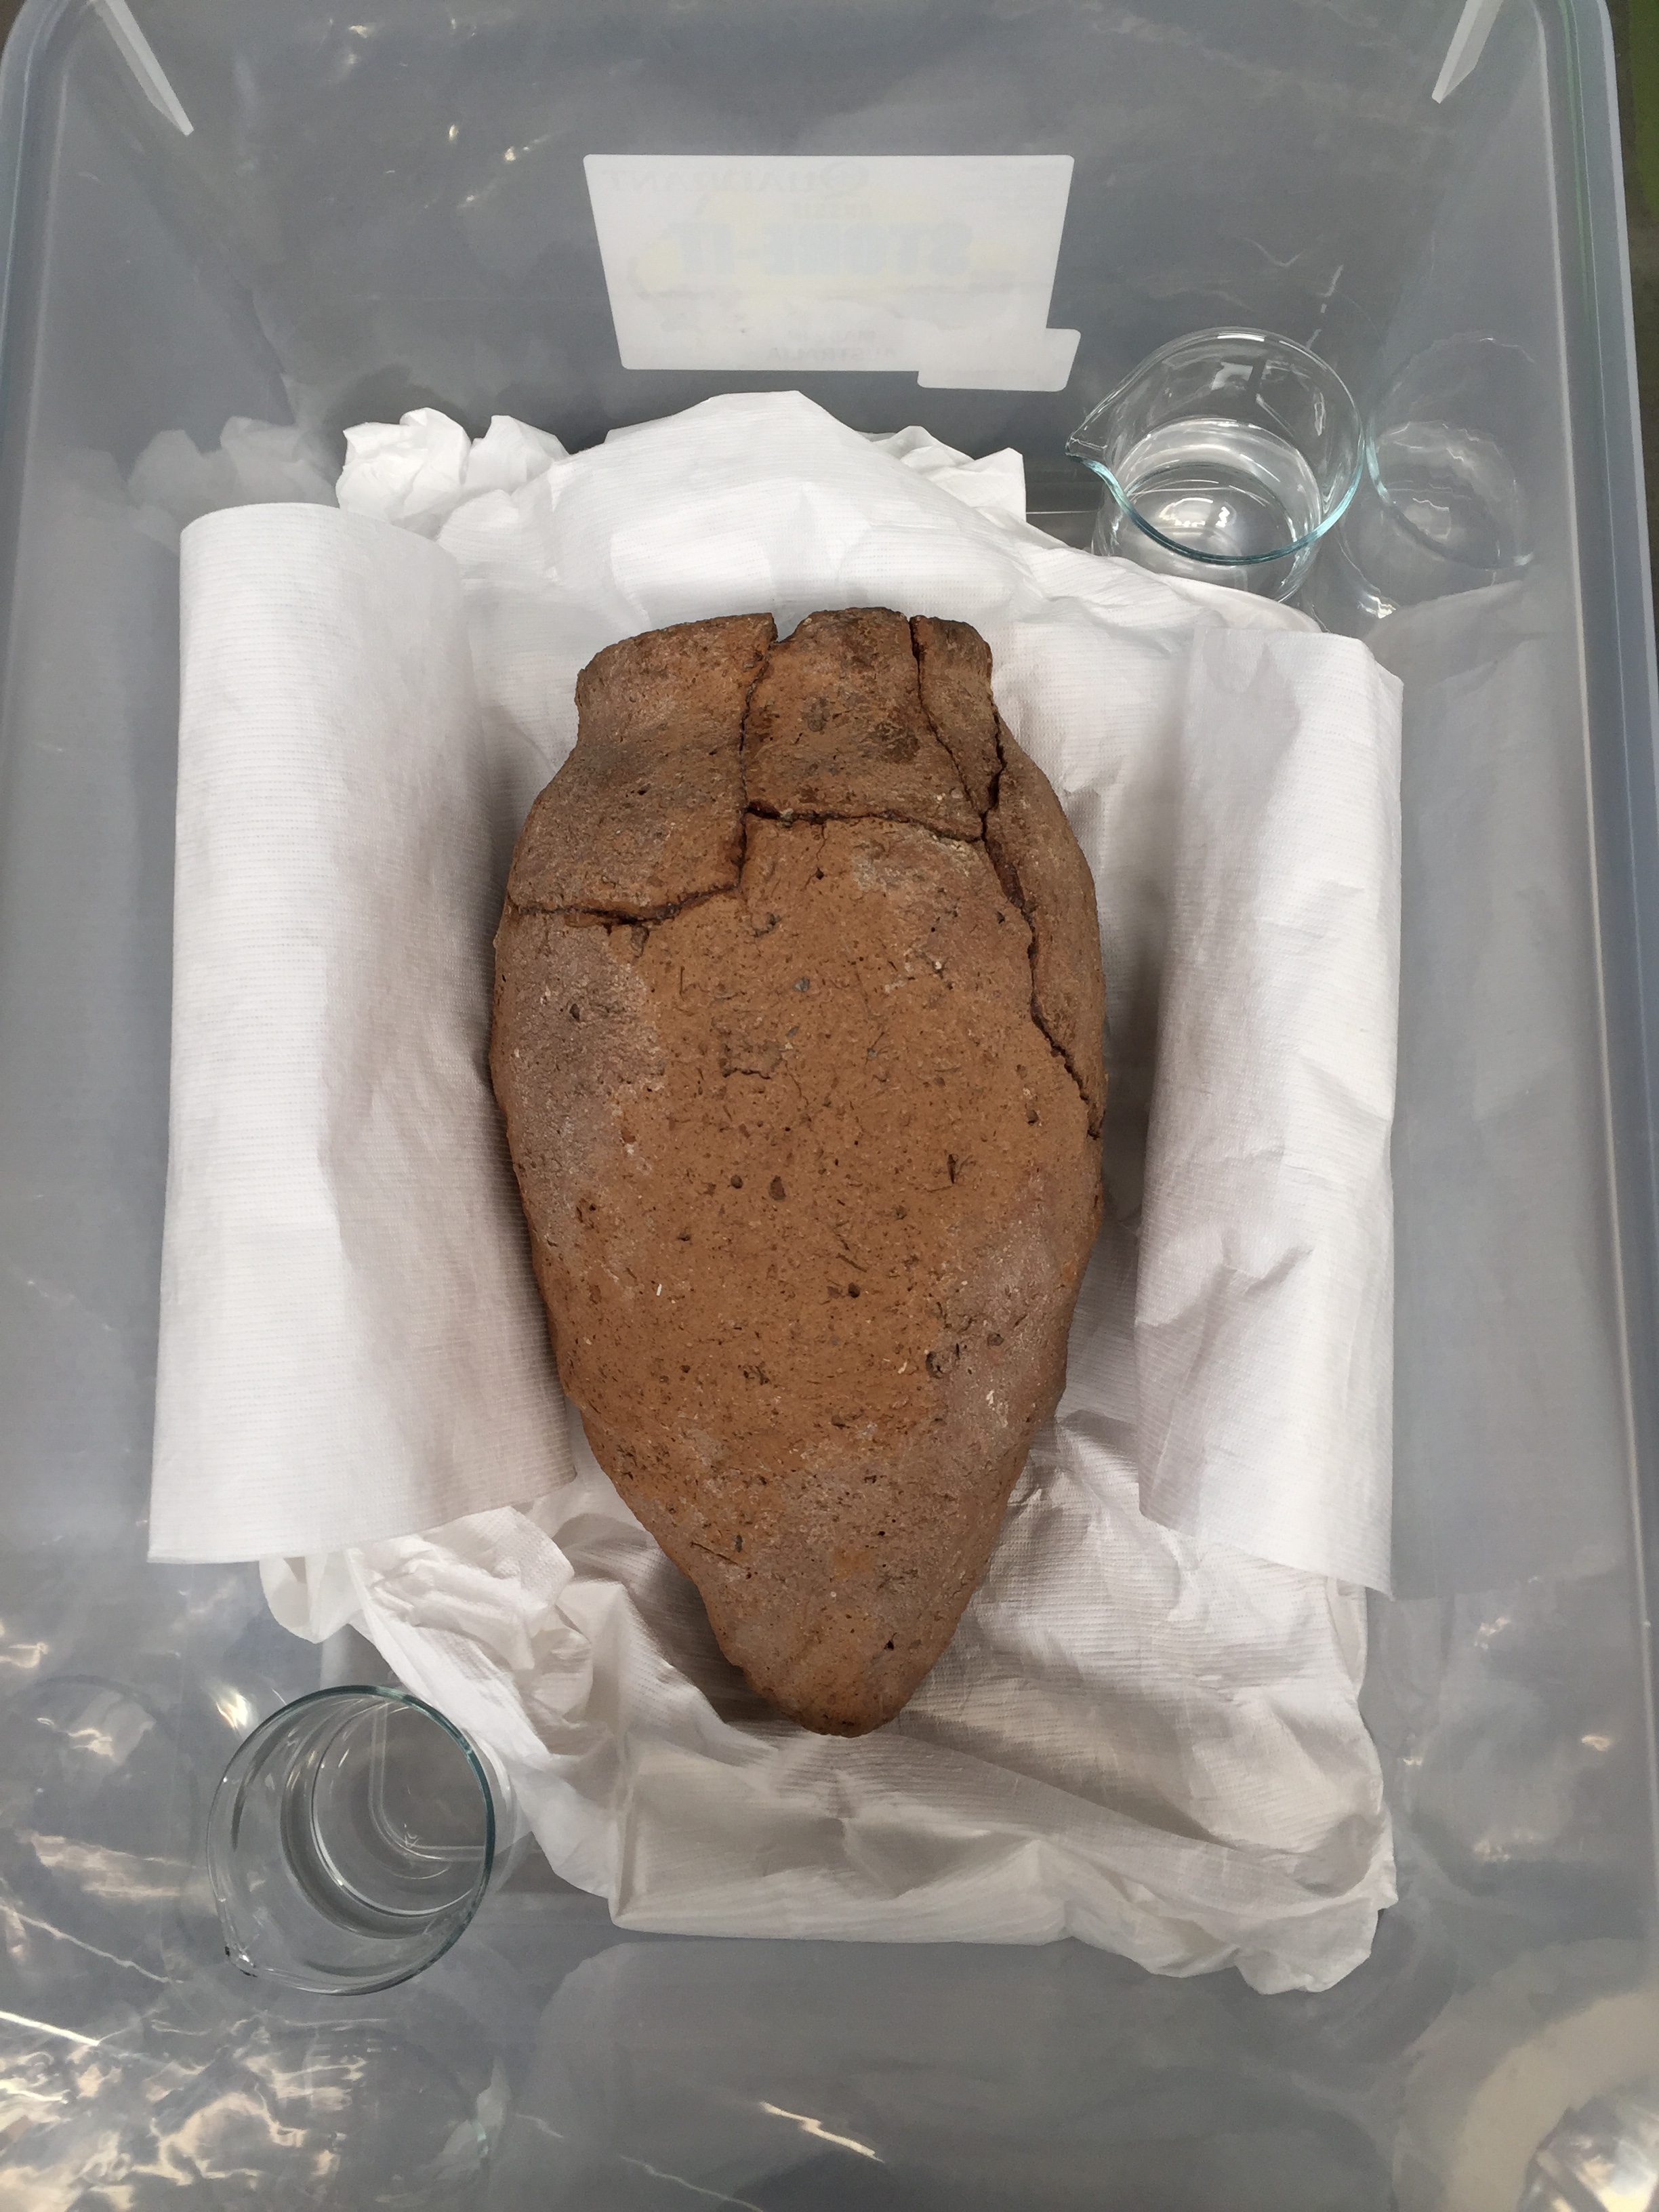
Figure 2- Egyptian jar in solvent chamber. Photograph by Sholeh Magzub.
Two vials of 100 ml acetone were then placed in opposing corners of the box. This treatment approach involved the acetone, a volatile solvent, evaporating in a contained environment. The placement of the vials allowed for even dispersion of solvent fumes which could then slowly coax apart the individual sherds.
The chamber was enclosed with cling wrap, covered with a lid, and sealed completely with masking tape. The vapours were then left to work their magic on the joins. This process was monitored over a 24-hour period, after which time it could be seen visibly that the joins had released.
The chamber was opened in a fume hood for safety, and the pieces were gently removed and placed over Mylar®, a clear, non-stick material. This was carried out so that the adhesive would dry and not stick to the polyethylene bags meant to house individual sherds. In the case where the joins had slight resistance in removal, a scalpel blade was dipped in acetone and carefully passed through the Paraloid B-72.

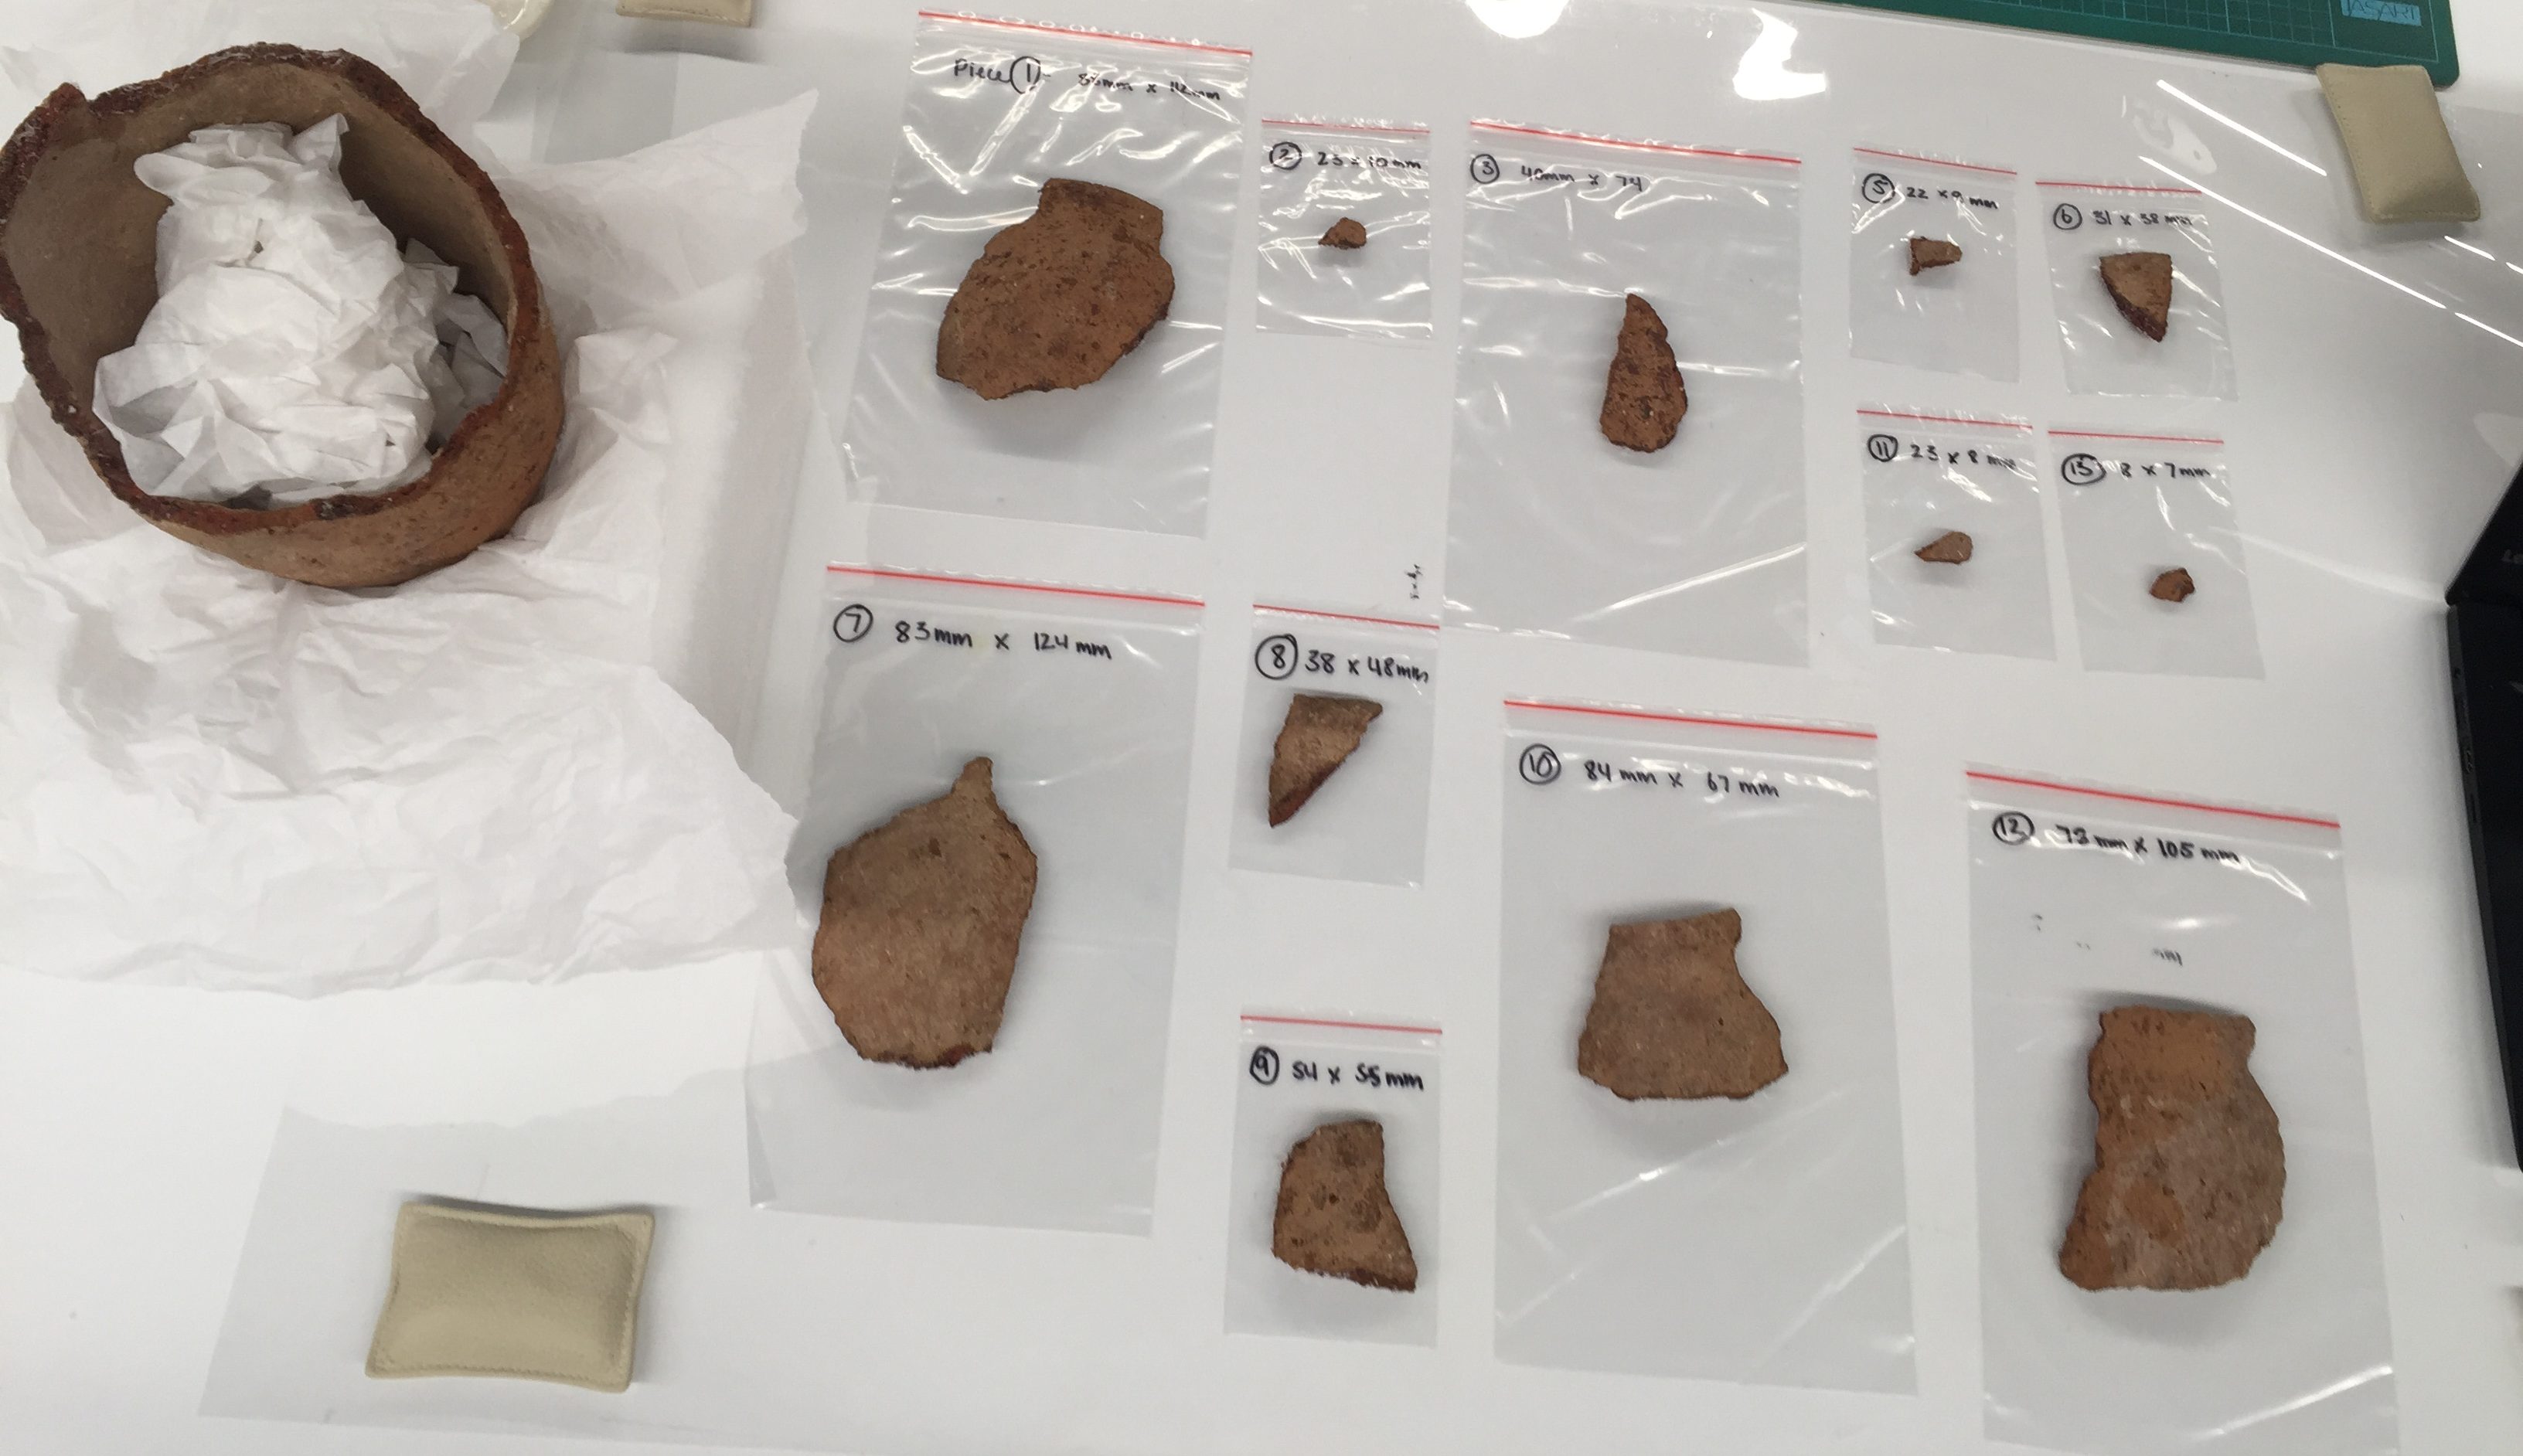
Now that the sherds are in individual pieces, the great adventure of treating each piece will commence. As I go into this next step, it will require patience, persistence and a flexibility of trying several approaches so that the original materials remain intact. My initial thoughts are that mechanical cleaning will be my main course of treatment, however this may be more easily facilitated in conjunction with solvent gels.
When Things Start Coming Together: Joining Sherds on an Ancient Egyptian Jar

After an extensive treatment of adhesive removal from all joins and surface areas on the individual sherds, the Egyptian jar was ready to be re-joined.This process would incorporate the use of Paraloid B-72, a conservation grade, acrylic based adhesive commonly used in joining of ceramics. To avoid visual distraction, the adhesive was applied more heavily to the interior areas of the joins so that it would not seep out of the front of the object. Diagrammatic maps created before disassembly assisted in the joining process. The process itself was completed in one sitting 1.5 hour sitting. After completion the object was supported with lightly applied tape to hold the new joins together and mounted upright to allow gravity to set the joins in place. The following video is a time lapse of the process.
After the adhesive was successfully set, and the interior joins had been filled for stability, the object was rehoused in a custom made archival box for long term storage and transportation. This box was designed with buffer cushioning and a support stand encased within for maximum stafety.

The video below shoes the object being placed inside the archival storage and transportation box.
Archival Storage for an Egyptian Jar from Sholeh Magzub on Vimeo.
Acknowledgements
I would like to express my gratitude for the professional support and guidance provided by Dr Nicole Tse, Jenny Dickinson, Penny Byrnes, Holly Jones-Amin and Evan Tindal.The guidance provided by the curators Robyn Hovey and Steve Martin of the Ian Potter Museum of Arts was invaluable to the progress of this project, and I thank them for their time and information provided. I would also like to thank the student conservators of the Grimwade Centre for Cultural Materials Conservation for their collegial support and assistance throughout this treatment process.