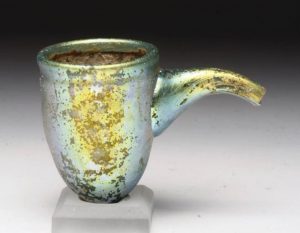
The glass spouted vessel: What is it?
by Karen Thompson
Over the next four blog posts I will take you through the treatment of this unusually shaped little glass vessel.
It arrived in early 2018 for conservation as part of the hands-on ‘Treatment 2 subject. It is was a gift to the Ian Potter Museum of Art (IPMoA) in 2011, and the collection titled it Glass Spouted Vessel.
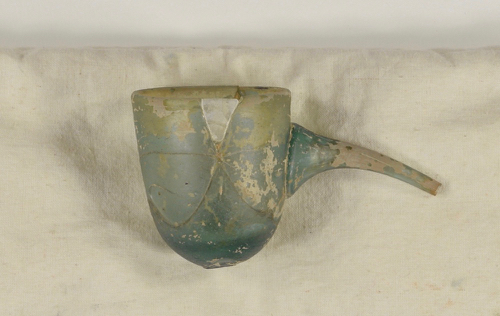
My first questions were: (1) what is it and what was it used for, and (2) when and where is it from?
These questions are not idle curiosity, but will frame whether, and what nature of, treatment is appropriate. Also, and equally importantly, it would confirm if it would be appropriate for a female conservator, without ancestry linking her to the originating culture, to handle the object.
Starting with clues from initial visual observations:
- The blueish-green ‘natural aqua’ colouring – no deliberate colouring or decolouring – hints to the Roman era.
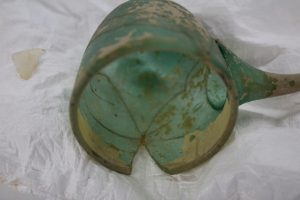
- Two things indicate that it has been blown: (1) the glass fabric of the bowl has many little spherical bubbles and some large lens-shaped bubbles, and (2) the snipped solid pontil (or punt) mark on the bottom. The symmetry of the bowl and rim indicate perhaps this component was mould-blown.
- The hollow spout holds elongated stretched bubbles and strain lines, indicating it has been pulled from a second gather.
- The white/tan surface deterioration (or accretion) suggests it has been from an archaeological context.
- There is no decoration, the original glass surface is not refined, and the spout is asymmetrical.
- The unfinished pontil mark indicates the vessel is not meant to sit on the bowl base.
- The above points to this being a utilitarian, relatively low status, object.

It is also obvious that the vessel has been subject to a sharp pointed force and broken into pieces. It has previously had competent conservation treatment: to bond original fragments, and to fill the space where original glass has not been recovered.
The search for similar items
The initial stages of examination and research were purely object-centered: that is, additional information from the collection custodian would hopefully be forthcoming, but is was not immediately available.
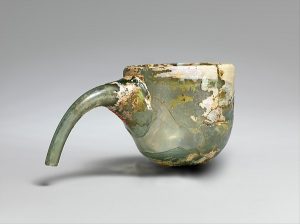
Therefore, an internet search was in order. Finally this lead to an object at the Metropolitan Museum of Art (‘The Met’): a physician’s cupping glass or alembic, from a 1939 excavation in Nishapur, Iran, and attributed to the 9-11th century Islamic period (object 40.170.132).
More examples were then found.


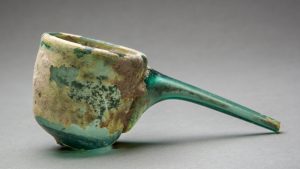


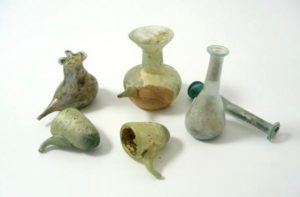


Links to original pages of images in gallery: (a), (b), (c), (d), (e), (f), (g), (h), (i)
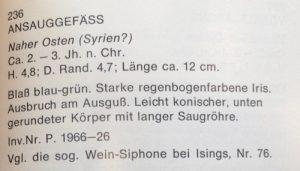
Some of the above examples are from auction sites, and while descriptions may be considered fair in good faith, they are not to be relied upon in a scholarly manner. Although many state these vessels are ‘Roman’, the only similar shape found in literature is from a 1974 Düsseldorf collection book (von Saldern, p. 157) – pictured below.
Finally, the below example from Columbia University. Which is a very similar shape (especially the rim), but the information is from Ebay and care must be taken with accuracy.

The Corning Museum (middle image in above gallery) and The Metropolitan Museum of Art may be considered the most recent and reliable. Particularly the latter’s publication Nishapur: Glass of the early Islamic period. On glass vessels of this shape, it names them ‘Glass for Medical or Chemical Use’ and states (p. 186):
‘Vessels with a cylindrical, globular, ovoid, or pear-shaped body and a long spout are found in nearly every excavation site of the Islamic period, usually in considerable numbers. The spout may have a slight bend or a deep one. They appear only in glass. The quality of the glass and of the manufacture shows that these were purely utilitarian vessels. Since the types have hardly changed over the centuries, precise dating is not possible. Despite the widespread occurrence of the vessels, very little is known about their actual use. It was once thought that these vessels were used as cupping glasses for hygienic or medical procedures, but now it is believe likelier that they were used as alembics, probably in connection with a distillation apparatus, in chemistry or alchemy experiments. It is also possible they were used in homes to produce rose water or date wine … The Nishapur finds indicate that the vessels may have been a common household necessity.’
Conclusions
What is it? Following The Met’s example, it is likely a physician’s cupping cup or a vessel used in wine or perfume making.
When / Where is it from? Possibly from the Near-Middle East, 9-11th century CE; maybe as early as 2nd century CE.
Does it have spiritual values? No literature has yet been found to suggest so.
Is it appropriate for a female conservator, not from the originating culture, to treat it? No indication of restrictions has been found, so yes.
Part Two: Disassembly
This is the second in the series of posts covering treatment of a little glass vessel.
Following from my initial post, in which I concluded it was appropriate for me to work on this little vessel, actual treatment began.
Well, actually, treatment only began after permission for the treatment proposal was received from the custodian. Putting together the proposal required extensive research into the object (note 1) and possible treatment paths.

I had proposed that the best outcome for the vessel would be the removal of the old adhesive, reassembling with a new adhesive, and creating a less obtrusive fill.
To find the right solvent to remove the adhesive, it first had to be identified. Using both ultraviolet-induced visible fluorescence and FTIR (Fourier-transform infrared spectrometry) on sampled slivers of dried adhesive, it was determined that the vessel had three adhesives: probably Paraloid B72 on the fill, and both cellulose nitrate and animal glue on the original fragments.
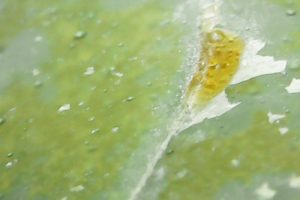
I could not be sure how much of the animal glue remained, nor where, as the joins were tight and the cellulose nitrate’s fluorescence overwhelmed any that the glue would emit.
The safest, and most commonly used, option was to start with a vapour chamber with acetone. It was recognised that it may not release all fragments due to the animal glue not responding to acetone, but I had hoped there was only the smallest amount of that in the joins.
- The chamber: two 100ml beakers with 20ml of acetone in each, with the vessel on a small tyvek-covered pillow, in a polyethylene bag with the end turned over several times and secured with pegs
- The first attempt was unsuccessful due to a leaking bag. However it was interesting for the fact that the little tyvek pillow I had stuffed with polystyrene (beanbag) balls had lost almost all volume – the lesson being not to put polystyrene in a chamber with acetone!
- The second attempt – a new bag and refilling the pillow with dacron – was successful only in removing the fill.

Image 3: Vapour chamber 2 - The vessel was then left in the chamber overnight. Only one of the original fragments budged. In fact, the adhesive at the ends softened but then split along an internal crack instead of along the original break line – making two fragments from one. The crack had been photographed during initial examination, but it was unclear if the crack propagated the last 2mm to the break; perhaps the softening of the adhesive at the ends of the join had released tension?

Image 5: the object after the spout fragment broke along an existing crack-line - The third attempt – with two bags – was also unsuccessful. It was time for plan B.
Initially I was worried about the vapour chamber, but soon realised that the adhesive doesn’t liquify (putting fragments in danger of falling suddenly), but instead softens so that the fragment moves away when gently nudged (though probably would with gravity if left for too long), with the adhesive remaining a bit sticky and tacky.
Unfortunately, there was more animal glue than I’d hoped. After checking the Davison and Koob glass-bibles and various other expert sources, I chose to brush on acetone for the cellulose nitrate, alternating with deionised water for the glue. I wanted to be sparing with the water, as it is not good to get the surface of deteriorating glass too wet.
Less than an hour later the pieces were separated – each just slumping off in my gloved hands with a gentle prod.

Now for cleaning the edges of old adhesive.
- under a stereo microscope, with a lamp for additional light
- using a beaker each of acetone and deionised water
- applying acetone first, and if unsuccessful this indicated it was animal glue (which became sludge with water)
- using a wooden skewer first, then a pointed dental pick for the trickier parts, and a scalpel as a last resort
- the Paraloid B72 came off in a single clean film (it was only on the edges against the removed fill), compared with the sludge of the CN
- for the more stubborn areas that may be glue, ammoniated water was then tried (one drop of 30% ammonia to 100ml of deionised water)
- there areas of what may be stubborn glue, or in fact it could be surface deterioration; so while all care is taken to remove glue there is a point where this is ceased in case it is damaging the original glass
- there is a blind crack in one of the fragments that has dried yellow glue/adhesive in it – but it is dangerous to try too much to flood the crack to remove that glue, as it may in fact propagate it and further damage the glass – at the time of writing this is still an issue.

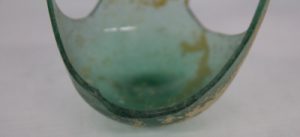
So far I have spent over 10 hours cleaning and have a little way to go.
Notes
- The first step is always documentation and visual examination – using photography, transmitted light (on a lightbox, as in my previous post, which is especially useful for transparent materials like glass), ultraviolet-induced visible fluorescence (where the object is irradiated with ultraviolet radiation and photographed using special filters), microscopy and simple observation. Great care it taken to assess the current condition, value/significance and needs of the object, and then to determine the most appropriate and ethical treatment within the timeframe available.
Part Two: Reassembly
This is the third in the series of posts covering treatment of a little glass vessel.
Following from my previous post, after nearly 15 hours cleaning the edges the original fragments were ready for reassembly.
I chose to use the glass-conservation standard adhesive, Paraloid B-72 30% in acetone, applied with a fine brush, after the edges were given a quick brush with acetone for a final clean.
Instead of many words, I thought a time-lapse video would be great. This compresses just over an hour’s work.
Part Four: Fill and Finish
This is the fourth and last in the series of posts covering treatment of a little glass vessel.
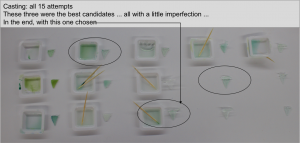
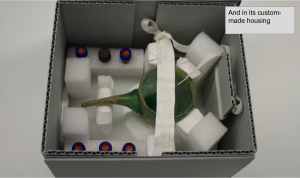
Following from my previous post, after the original fragments were reassembled, the next step is for the lost fragment to be created – the ‘fill’.
I thought a photograph-essay would be a fun way to show the process.
Thank you for reading.
Acknowledgements
The author would like to express special thanks both the lecturers and guest lecturers at the Grimwade Centre for Cultural Materials Conservation, as well as the kindness of the IPMOA staff in trusting me with their object. The author also thanks the fellow students for their help and support.
References
British Museum (BM) 2018, Collection online, accessed 8 February 2018, <http://www.britishmuseum.org/research/collection_online/search.aspx>.
Davison, S 2003, Conservation and restoration of glass, 2nd edn, Butterworth-Heinemann, Oxford.
Gallo, F, Marcante, A, Silvestri, A & Molin, G 2014, ‘The glass of the “Casa delle Bestie Ferite”: a first systematic archaeometric study on Late Roman vessels from Aquileia’, Journal of Archaeological Science, vol. 41, pp. 7-20.
Harden, DB 1936, Roman glass from Karanis: Found by the University of Michigan archaeological expedition in Egypt, 1924-29, University Press, Oxford.
Ian Potter Museum of Art (IPMoA) 2018, ‘Search Collections’, accessed 5 February 2018, <http://www.art-museum.unimelb.edu.au/collection/search-the-collection/>.
Koob, SP 2006, Conservation and care of glass objects, Archetype Publications, New York.
Kröger, J 1995, Nishapur: Glass of the early Islamic period, MetPublications, New York.
Kucharczyk, R 2005, ‘Early Roman glass from Marina el-Alamein’, Polish Archaeology in the Mediterranean (PAM), vol 16, pp. 93-99.
Metropolitan Museum of Art (MMoA) 2018, Collection, accessed 8 February 2018, <http://www.metmuseum.org/art/collection#>.
Olcay, BY 2001, ‘Ancient glass vessels in Eskişehir Museum’, Anatolian studiesi, vol. 51, pp. 147-158.
Prior, JD 2015, ‘The impact of glassblowing on the early-Roman glass industry (circa 50 B.C. – A.D. 79)’, PhD thesis, Durham University.
Swan, C 2013, ‘The Glass’ in SL Cohen (ed.), Excavations at Tel Zahara (2006–2009): Final Report The Hellenistic and Roman Strata, Archeopress, Oxford, pp. 103-119.
von Saldern, A 1974, Kunstmuseum Düsseldorf: Glassammlung Hentrich, Antiek und Islam, Kunstmuseum Düsseldorf, Düsseldorf.


