R Installation instructions
Statistical Consulting Centre
November 2022
Software requirements
You will have access to University computers with all needed software in the Wilson Computer Lab, but you are also welcome – indeed, encouraged! – to bring your own laptop and work on that, so you can continue to use R in a familiar environment after the course is finished.
If you intend to use your own laptop for the course, please read and follow the instructions below carefully, even if you have used R before. Note that we will not be able to devote time during the course to installing R on your machine, so you will need to follow these instructions on your own time before the course begins if you want to use your own laptop.
Installation of R and RStudio
If you’d prefer to watch the installation process in action, we also have a Youtube video detailing the installation and initial setup of R and RStudio. This video is best viewed in 1080p (HD) so you can read the text on the screen.
If you already have R installed on your own computer, make sure you have at least R version 4.1 and RStudio version 1.4. The R version is shown in the console pane when you start RStudio. The RStudio version can be checked in the Help > About RStudio menu. Please also ensure that all R packages are up to date (Tools > Check for Package Updates inside RStudio).
- You can download R from https://cloud.r-project.org/. You will need to click on the link near the top of the page which best fits your computer: Download R for Windows, Download R for (Mac) OS X or Download R for Linux. Windows users will need to further click on the page for download R for the first time.
- After downloading, run the R installer and follow the instructions.
- You can download RStudio from https://rstudio.com/products/rstudio/download/. Click on the download button underneath “RStudio Desktop (Free)”.
- After downloading, run the RStudio installer and follow the instructions.
Ensure that you can open RStudio without any errors after the installation completes. For all of this course, we will be working with RStudio (white R in a blue circle icon) rather than the R Console (blue R with a white ‘swirl’ icon).
RStudio settings
There are a number of options in RStudio which we strongly recommend you set to avoid either immediate or future frustration. All of these can be found in the Tools > Global Options menu.
- In the General tab: untick “Restore .Rdata into the workspace at startup” and set “Save workspace to .Rdata on exit” to “Never”. The default settings for these options work against the practices of reproducibility which we encourage. We further suggest unticking “Always save history (even when not saving
.Rdata)”, which avoids cluttering your working directories with.Rhistoryfiles.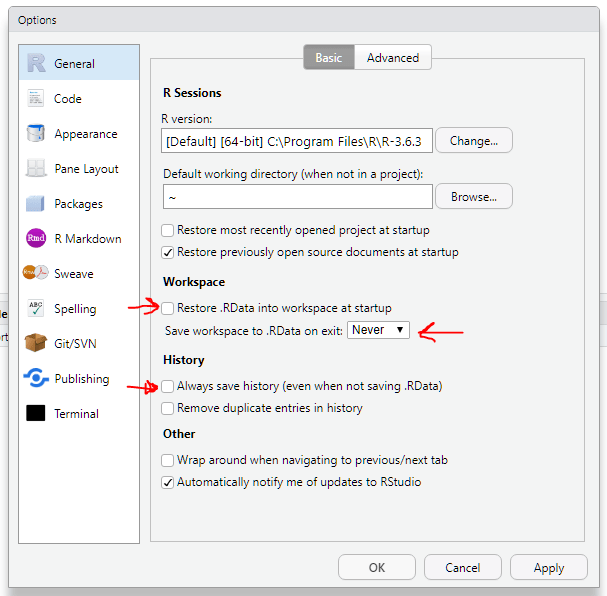
- In the Code tab, under Editing: untick “Insert matching parens/quotes”. Past teaching experience is that this feature is more like to confuse and frustrate than help you.

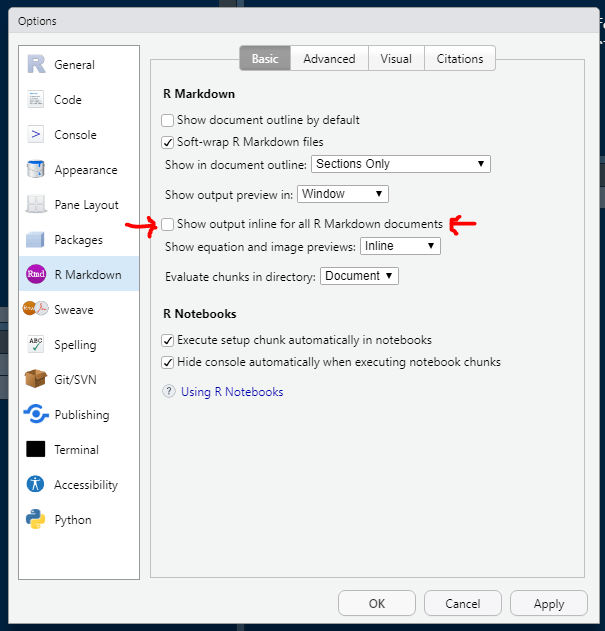
- In the R Markdown tab, untick “Show output inline for all R Markdown documents”. Again, this is a feature of RStudio which we believe works against the practices of reproduciblity which we encourage.
- In the Appearance tab, you may want to adjust the font size to make the text in RStudio more readable.
R package installation
We will be using several additional R “packages” in this course, which must be installed before use. You can download an R script file to install needed packages from this link. Installing these packages will also serve as a good way to check that RStudio is working.
If you’d prefer to watch the package installation process in action, we also have a Youtube video explaining our recommended RStudio settings and the package installation process. This video is best viewed in 1080p (HD) so you can read the text on the screen.
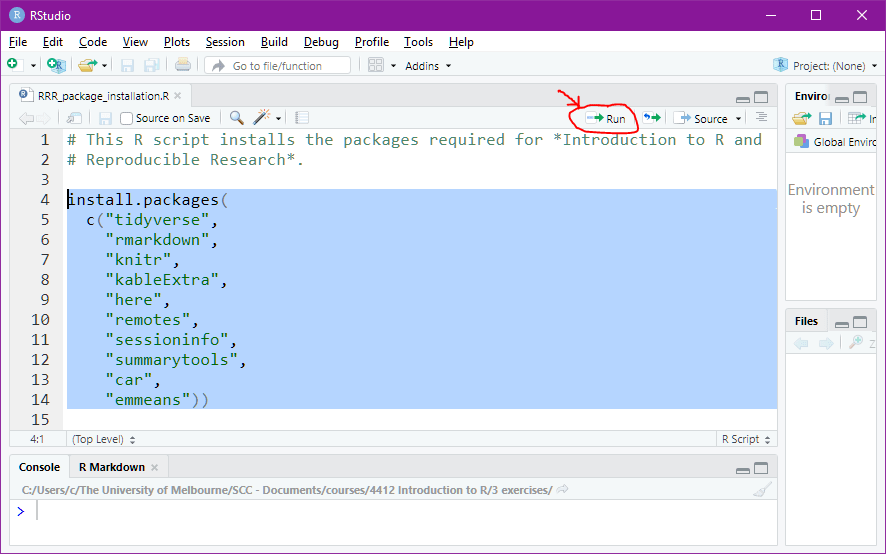
Save the R script file from the link above (SRW_package_installation.R) to your computer, and then open it in RStudio. Select the code beginning with install.packages( to the final ) and click the Run button above and to the right of the source editor pane.
Test your R installation
If you’ve followed the instructions so far, you should have R and RStudio working on your computer, ready to go for the course. To test it out, and make sure you’re ready to go for the exercises on the first day of the course, you can download an example R Markdown document and ‘knit’ it to create an HTML file which anyone can view.
Move the R Markdown file Rmarkdown_example.Rmd you’ve downloaded into a sensible folder (e.g. one you have created for the purposes of this course) and double-click on it to open it in RStudio.
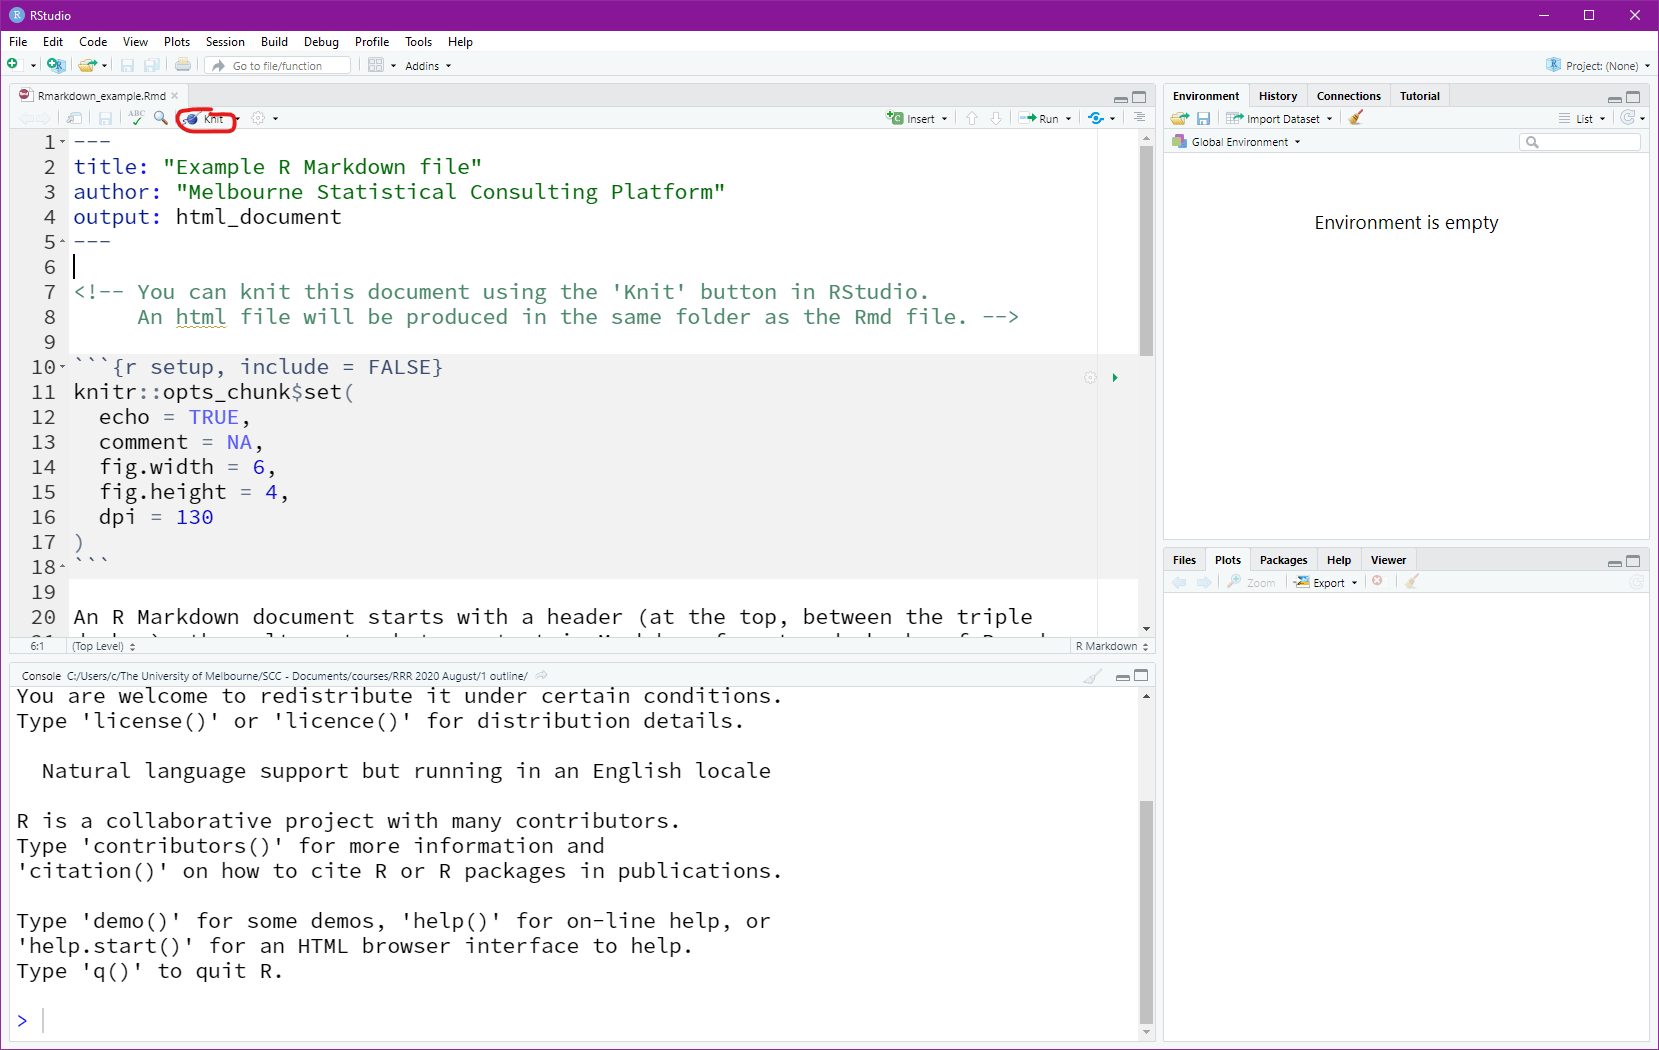
Click the ‘Knit’ button (circled in red above) and you should see output like the below:
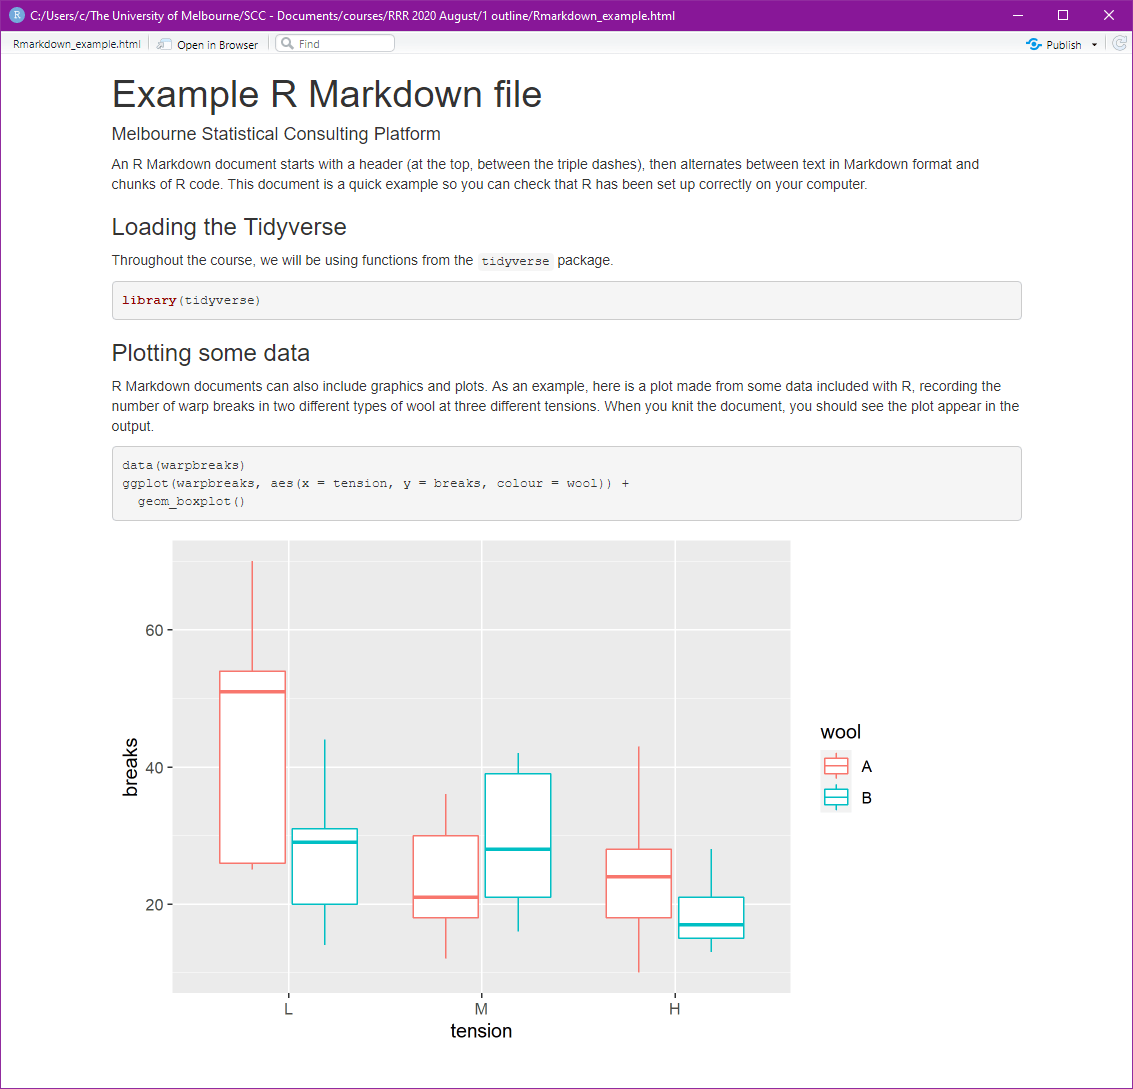
The knitting process will create an HTML file, Rmarkdown_example.html, in the same folder as the original R Markdown file. This file contains the code and output from the R Markdown document in a form which anyone can view in a web browser.
If this produces similar results for you as shown above – congratulations! You’re ready to start the course and properly learn what’s going on here. If not, please contact us before the course begins so we can assist you with any technical difficulties.
Once again, if you’d prefer to see this in action, we also have a Youtube video explaining this process. This video is best viewed in 1080p (HD) so you can read the text on the screen.